Creating a product
This page is an in-depth documentation of how to create and manage a product in EandoX. It will cover all the features of the product creation process, from the basics to the advanced features.
New to EandoX?
If you’re new to EandoX and just want to get started quickly (without diving into the advanced features), you can read the product creation quickstart guide.
Products vs components
In EandoX you have two different types of products: products and components.
The main difference between the two is that a component is intended for internal use only within your company, meaning it cannot have individual reporting, such as an EPD, on its own.
If you have a product that is used exclusively as a sub-assembly in other products (e.g. a seat used in multiple chairs, but never not sold separately), you can create it as a component.
Read more
The component creation process is nearly identical to the product creation process, but some details differ.
Read more about the specifics of components here.
Creating a new product
Navigate to the Products page in the left navigation menu, and click the Create product button in the top right corner.
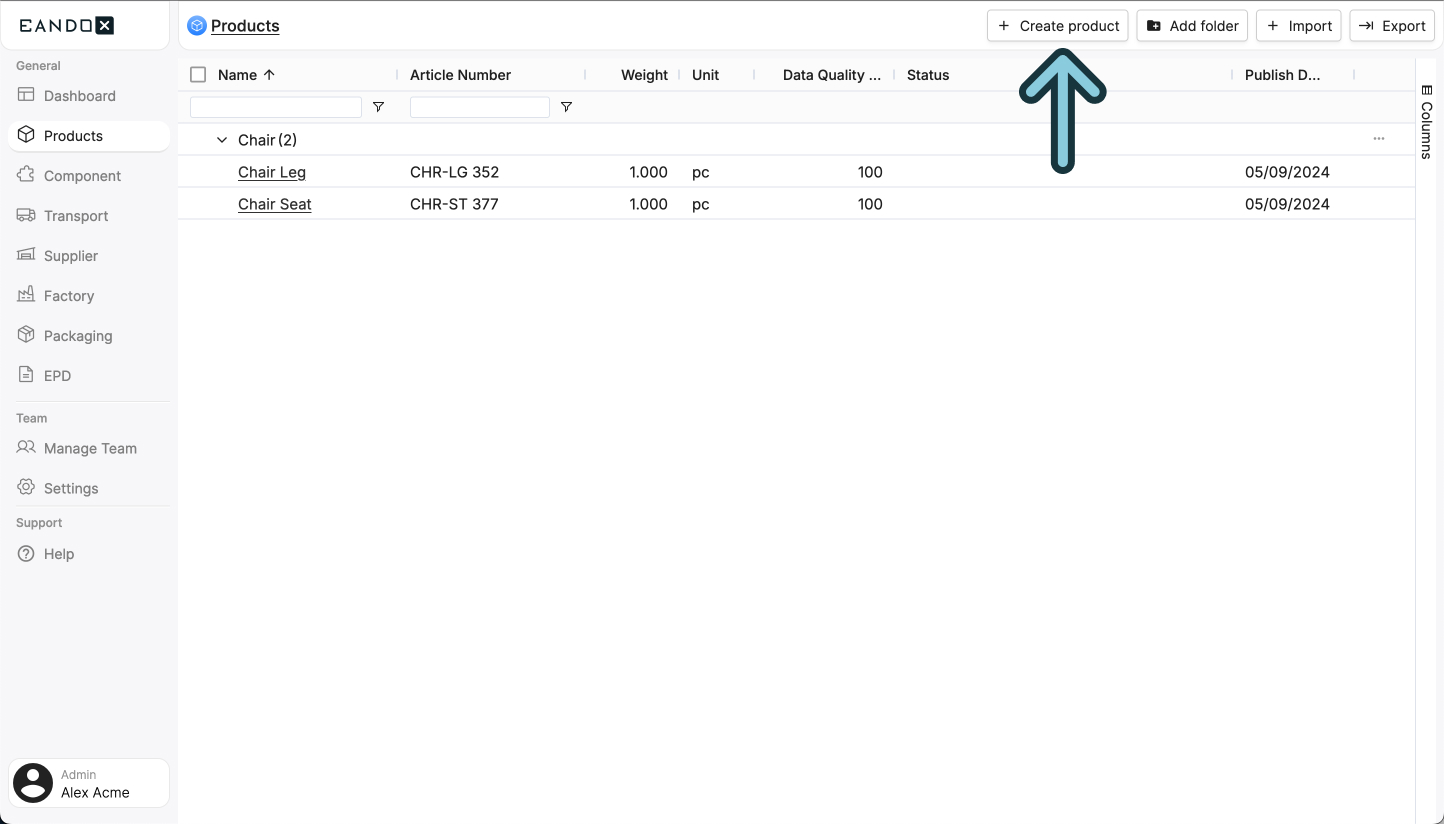
This will open a sidepanel where you can fill out the necessary information about your product. This information can be changed later on, but it is recommended to fill it out correctly the first time.
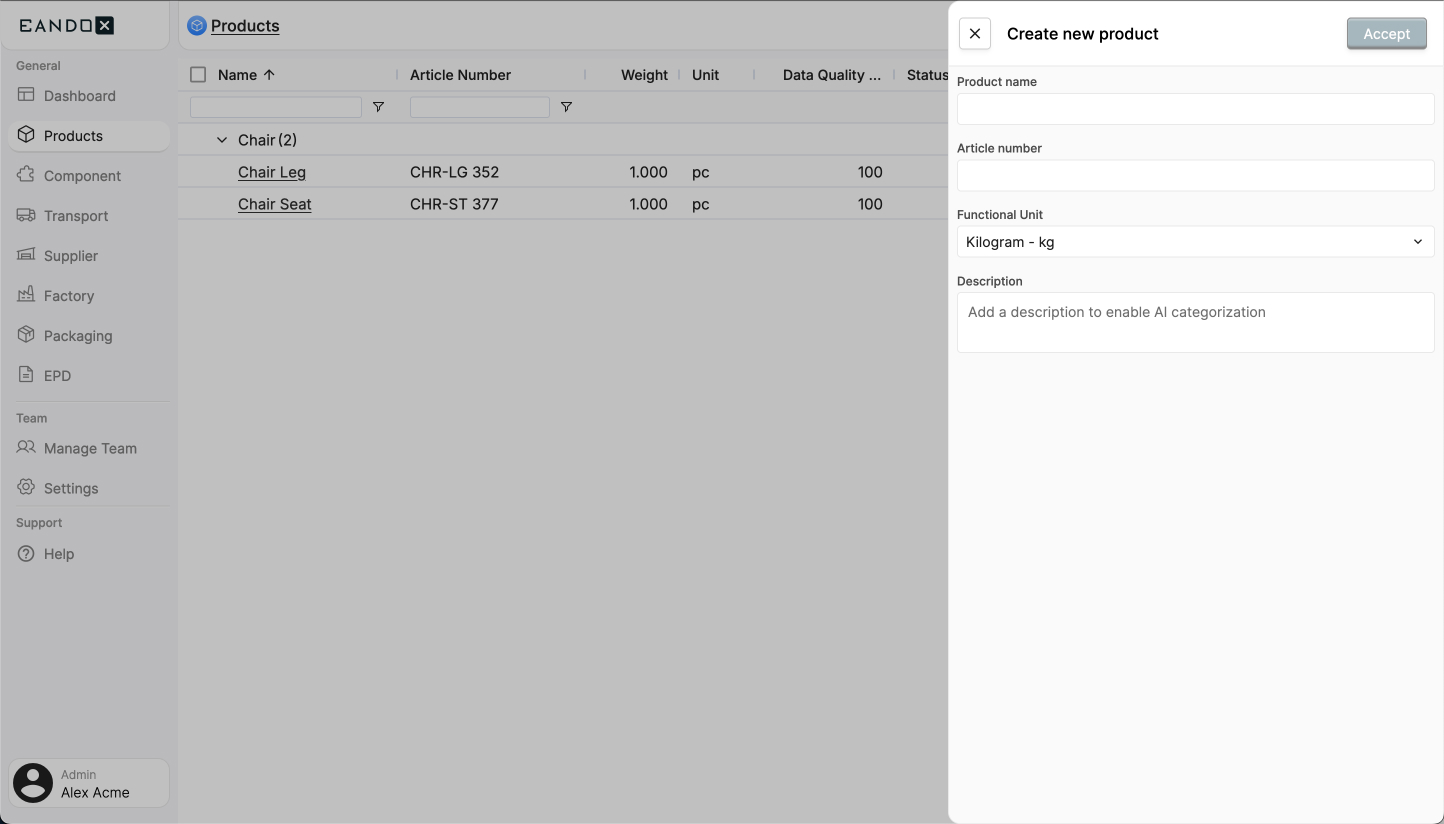
The fields in the sidepanel are as follows:
| Field name | Field description |
|---|---|
| Product name | The name of the product. |
| Article number | This is used to identify the product, so it should be unique. |
| Functional Unit | The unit in which the product is sold. |
| Description | A description of the product. |
Click Accept to create the product. This will take you to the product page where you can see and edit the details of your product, and start attaching other entities to it.
Editing a product
If you want to edit an existing product, you can navigate to the Products page in the left navigation menu and click the product you want to edit. From there you can follow all the steps below.
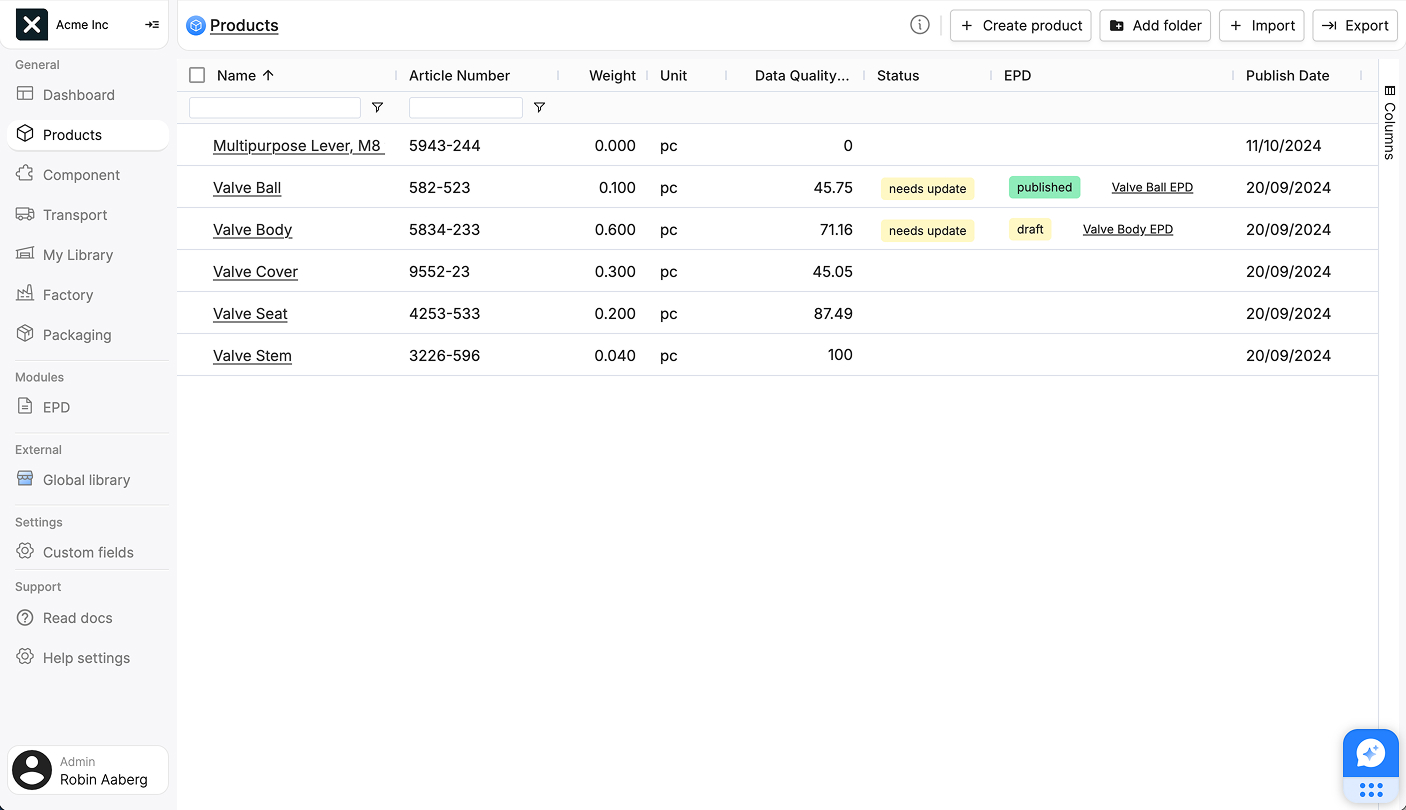
The product page
On the product page, you will see multiple sections:
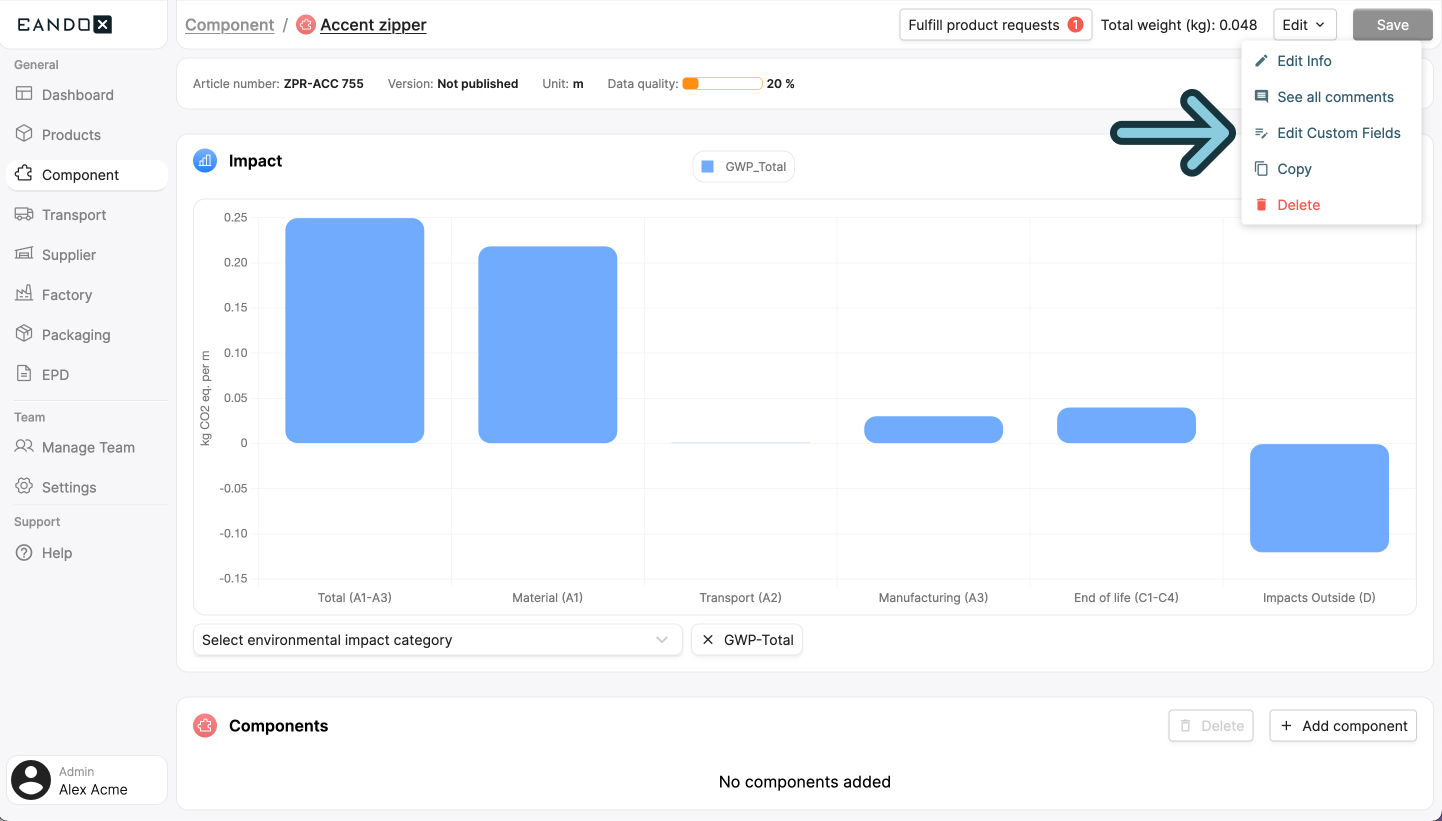
- Header: Includes the following buttons:
Edit: A dropdown menu with options to:- Edit the product information
- See all comments
- Edit custom fields
- Share the product
- Copy the product
- Unpublish the product
- Delete the product
Save: Will save the product, without publishing it.Publish: Will publish the product.Update: Will update the product.Fulfill product requests: Read more about product requests here.- The
Total Weightof the product.
- Product details: Shows the product information, along with the current product version and the quality of the entered data.
- Impact: Shows the environmental impact of the product. Requires data to be entered. Read more about Impact graphs here.
- Components, Materials, Packaging and Factories: Shows the entities attached to the product, and allows you to add, edit and delete them.
Managing components
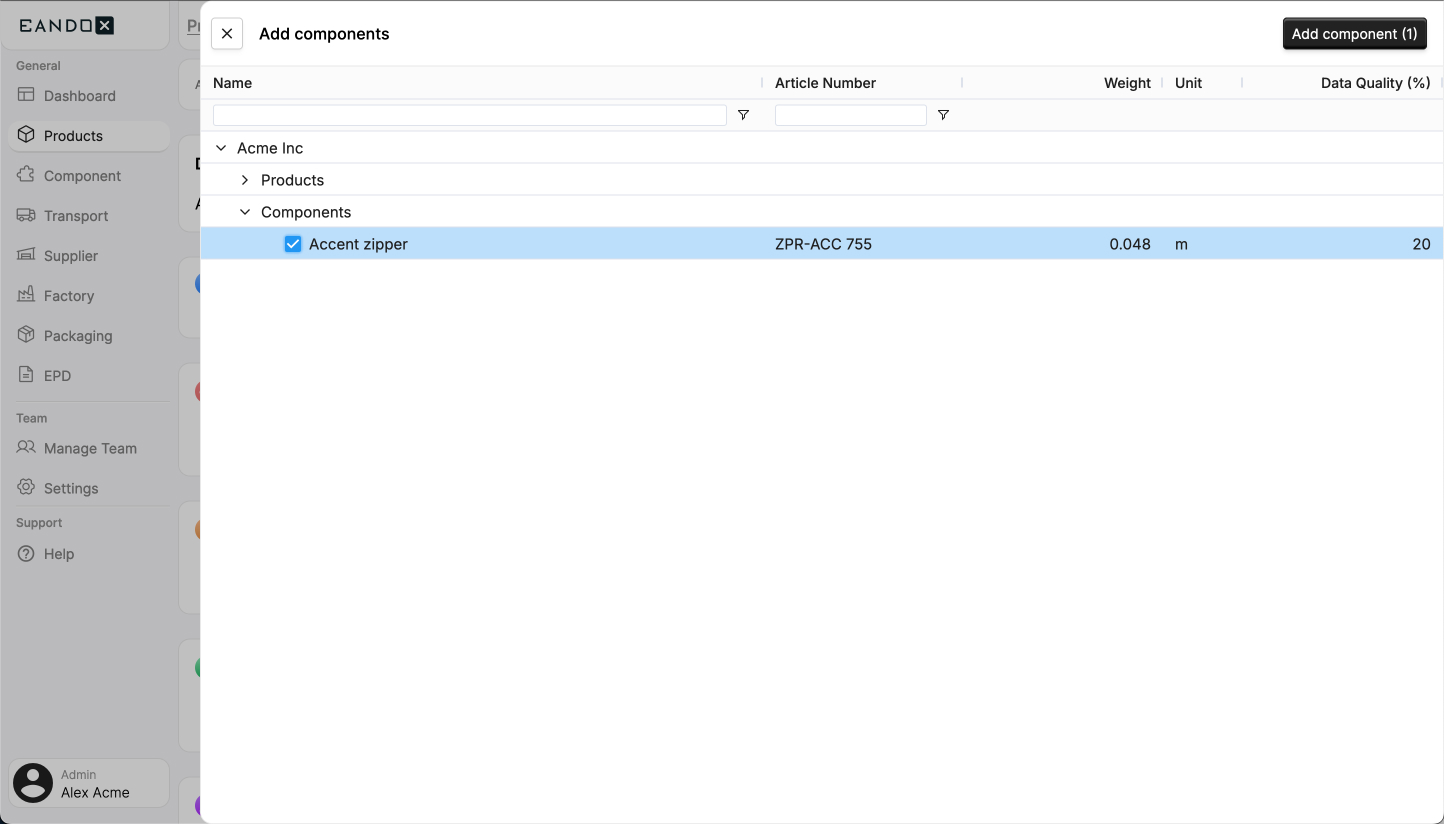
In the Components section, click the Add component button.

This will open a sidepanel where you can search for all components and products that are available in your catalog and library.
Library vs catalog
The term Catalog is used when speaking about the collection of products, components, packaging, and factories created by your company.
The Library contains products created by external suppliers.
Nothing in the list?
If this list is empty, you need to create a component, add supplier products to your library, or request a component from a supplier first.
Select the components you want to add. Then click the Add component button in the top right corner of the sidepanel. This will close the sidepanel and the components you selected will show up in the table of added components.

The table has the following columns:
| Column name | Column description |
|---|---|
| Name | The name of the component. Clicking the name will open the editing page for the component. |
| Type | The origin of the component data. The types Component or Product indicate that this entity is created by you. The types Library Product or EPD Product indicate that this was is imported from the Global Library. |
| Article Number | The article number of the component. |
| Amount | The amount of the component used in the product. The unit this amount refers to can be seen in the Unit column. |
| Unit | The unit of the component. |
| Weight | The weight of one unit of the component. |
| Supplier | The name of the suppler that created the component. Will be blank if the component is created by you. |
| Waste | The amount of waste (in percent) created during the production of this component. |
| Transport | The transport of the component. Clicking the transport will allow you to edit the transport data for the component. |
| End of life | What kind of EOL data that is associated to this component. Only available for items of the type EPD Product. |
| Edit | A button that opens a sidepanel where you can see and edit all settings for the component. |
Removing components
To remove a component from the product, hover over the name, and tick the checkbox that appears in front of the name. Select all components you want to remove and click the Delete button in the component section header.
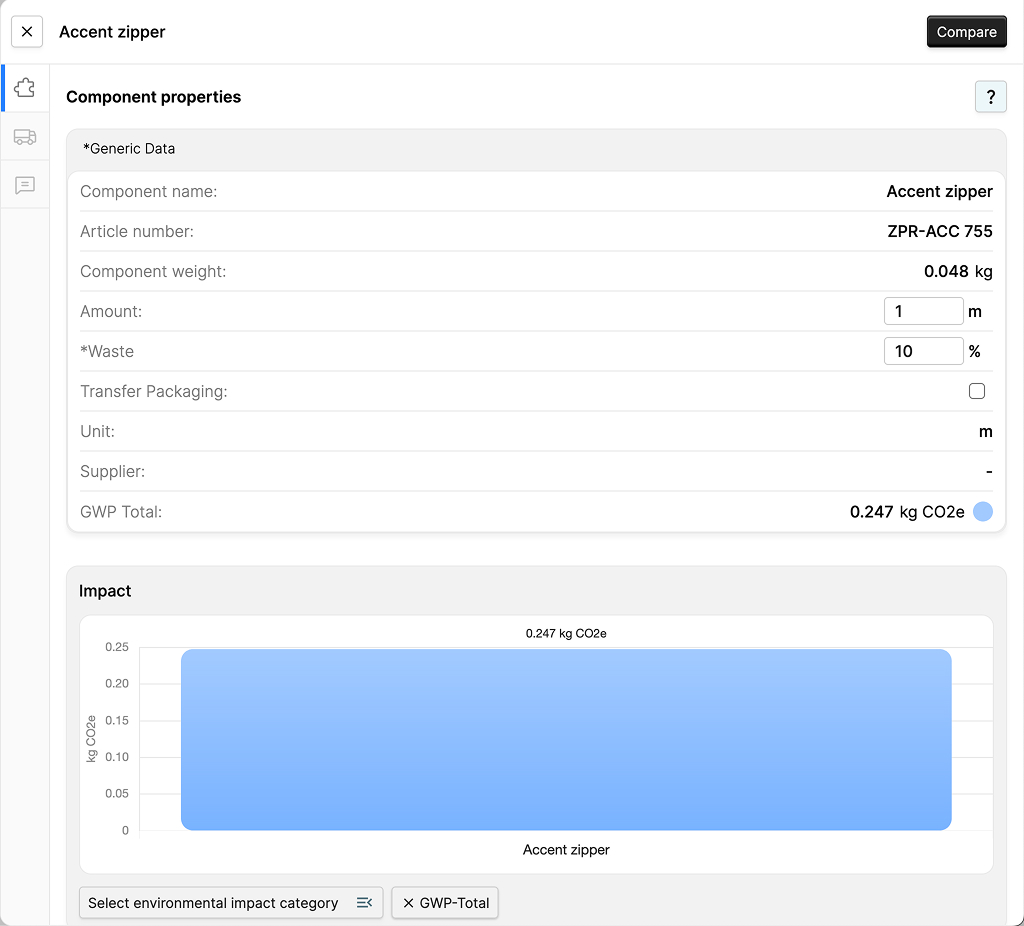
The component sidepanel
To easier edit the added component data, click the Edit button.

This will open the component sidepanel:
Editing the right data
The side panel only lets you edit the component data for the product you're working on. To edit the component itself, click its name in the "Components" table or go to the Components page.
On the left edge of the sidepanel you can find three tabs:
1. Entity data
Shows all data for the component. Some of the fields will be editable.
All fields that start with * are using generic data. Adding the correct data here will improve the data quality of the product.
In this tab you can also find a graph with the environmental impact of the component.
2. Transport data
Shows all transport data for the component. Here you can either use generic data, or edit the transport data to improve your data quality.
In this tab you can also find a graph with the environmental impact of the transport.
3. Comments
Shows all comments for the component. These comments are only tied to the component in the product. They will not show up in the comments on the Components page.
TIP
A common workflow is to request a component from a supplier and create a placeholder component yourself in the meantime.
Once the supplier responds, you can delete the placeholder and replace it with the supplier's component.
Further reading
Read more about components, what they are and how they are created here.
Managing materials
In the Materials section, click the Add material button.

This will open a sidepanel where you can find all available materials in EandoX. It also features a search bar at the top, to make it easier to find what you are looking for.
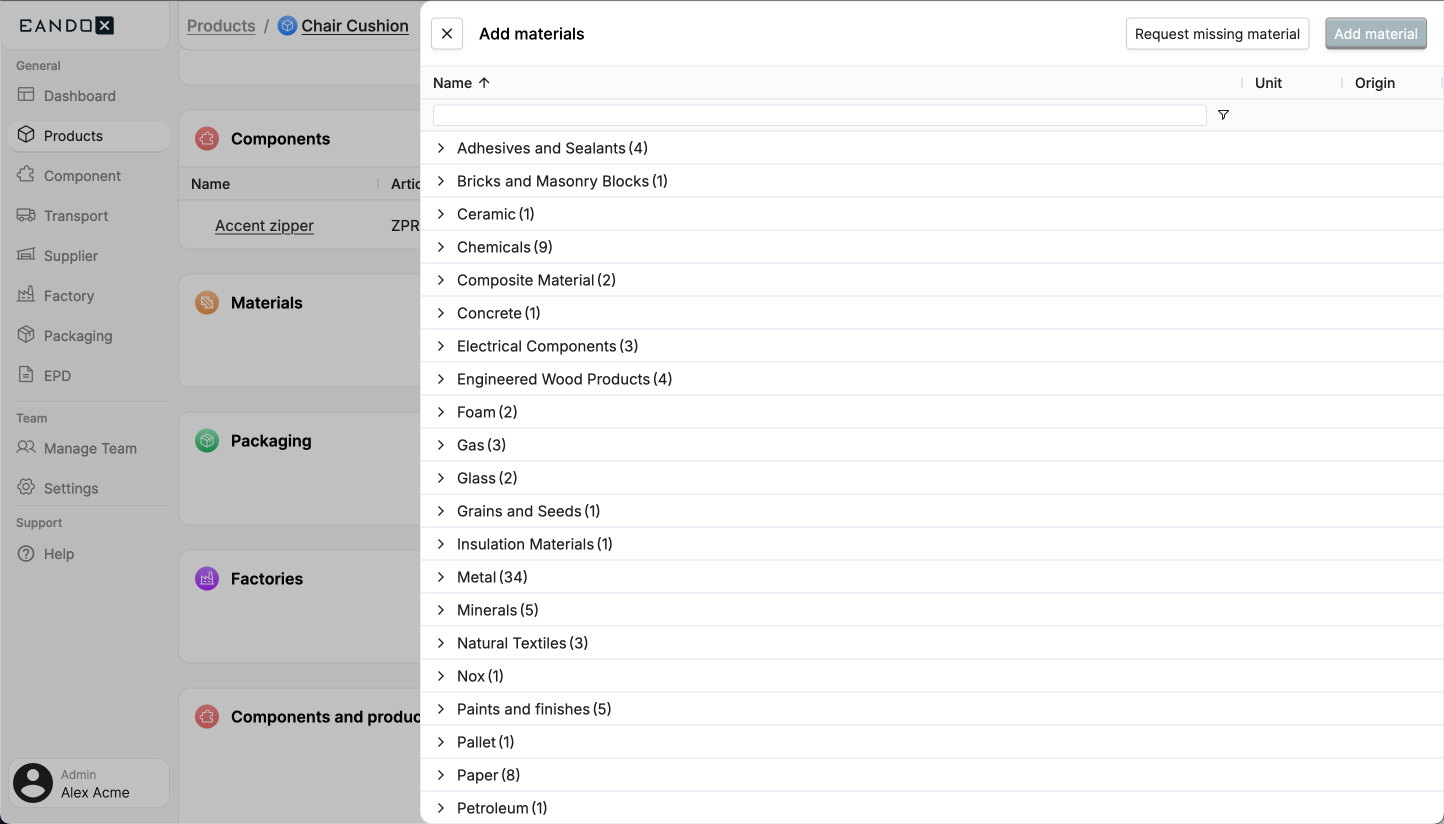
Missing a material?
If you can't find the material you need, you can click the Request missing material button in the top right corner of the sidepanel. This will allow you to send us a request so that we can add it to the platform.
Select the materials you want to add. Then click the Add material button in the top right corner of the sidepanel. This will close the sidepanel, and the materials you selected will show up in the materials table.

The table has the following columns:
| Column name | Column description |
|---|---|
| Name | The name of the material. |
| Weight | How much of this material that is used in the product. The unit this amount refers to can be seen in the Unit column. |
| Unit | The unit of the material. |
| Chemical identifier | The chemical identifier of the material. Follows the CAS or EC standards. Mainly used for generating EPD's. |
| Waste | The amount of waste (in percent) created during the production of this material. |
| Recycled content | The percentage of the material that is recycled content. |
| End of life | The end of life of the material. Clicking this will open the material sidepanel where you can enter how the material will be disposed of at the end of its life. |
| Transport | The transport of the material. Clicking the transport will allow you to edit the transport data for the material. |
| Include process | Wether or not to include the data on the full manufacturing process for the material. Uncheck this box if you get the material unprocessed. |
| Edit | A button that opens a sidepanel where you can see and edit all settings for the material. |
Removing materials
To remove a material from the product, hover over the name, and tick the checkbox that appears in front of the name. Select all materials you want to remove and click the Delete button in the material section header.
The material sidepanel
To easier edit the added material data, click the Edit button.

This will open the material sidepanel:
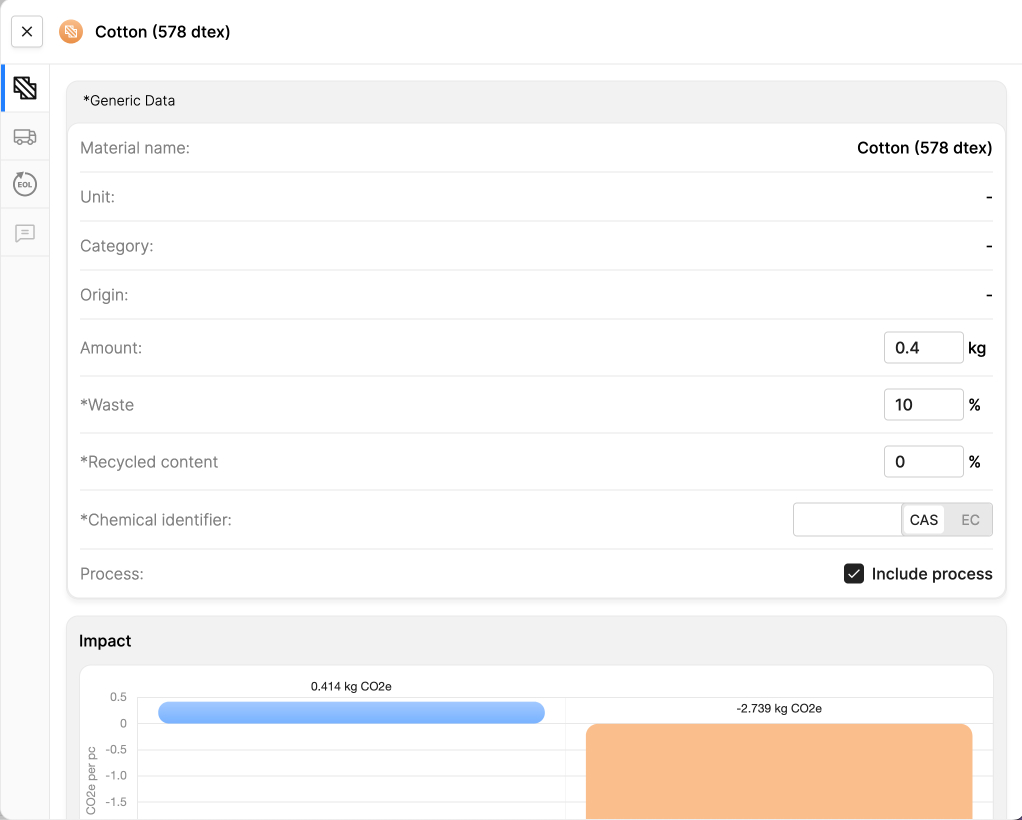
On the left edge of the sidepanel you can find four tabs:
1. Entity data
Shows all data for the material. Some of the fields will be editable.
All fields that start with * are using generic data. Adding the correct data here will improve the data quality of the product.
In this tab you can also find a graph with the environmental impact of the material.
2. Transport data
Shows all transport data for the material. Here you can either use generic data, or edit the transport data to improve your data quality.
In this tab you can also find a graph with the environmental impact of the transport.
3. End of life data
Shows all data on how the material is disposed of after its lifetime.
The total percentage needs to add up to 100%. Otherwise, the data will not be saved.
In this tab you can also find a graph with the environmental impact of the end of life.
4. Comments
Shows all comments for the material. These comments are only tied to the material in the product.
Managing packaging
Default packaging
You can create products without adding any packaging to them.
If you don't add any packaging entities to a product, EandoX will use generic packaging data. This will lower the products data quality, and might make your environmental impact score worse.
In the Packaging section, click the Add packaging button.

This will open a sidepanel where you can search for all packaging that is available in your library.

Nothing in the list?
If this list is empty, you need to create a packaging first.
Select the packaging you want to add. Then click the Add packaging button in the top right corner of the sidepanel. This will close the sidepanel and the packaging you selected will show up in the table of added packaging.

The table has the following columns:
| Column name | Column description |
|---|---|
| Name | The name of the packaging. Clicking the name will open the editing page for the packaging. |
| Type | The origin of the packaging data. The type Packaging Component indicates that this entity is created by you. The types Library Product or EPD Product indicate that this was is imported from the Global Library. |
| Amount | The amount of units of packaging. The unit this amount refers to can be seen in the Unit column. |
| Unit | The unit of the packaging. |
| Weight | The weight of the packaging. |
| Edit | A button that opens a sidepanel where you can see and edit all settings for the packaging. |
Removing packaging
To remove a packaging from the product, hover over the name, and tick the checkbox that appears in front of the name. Select all components you want to remove and click the Delete button in the packaging section header.
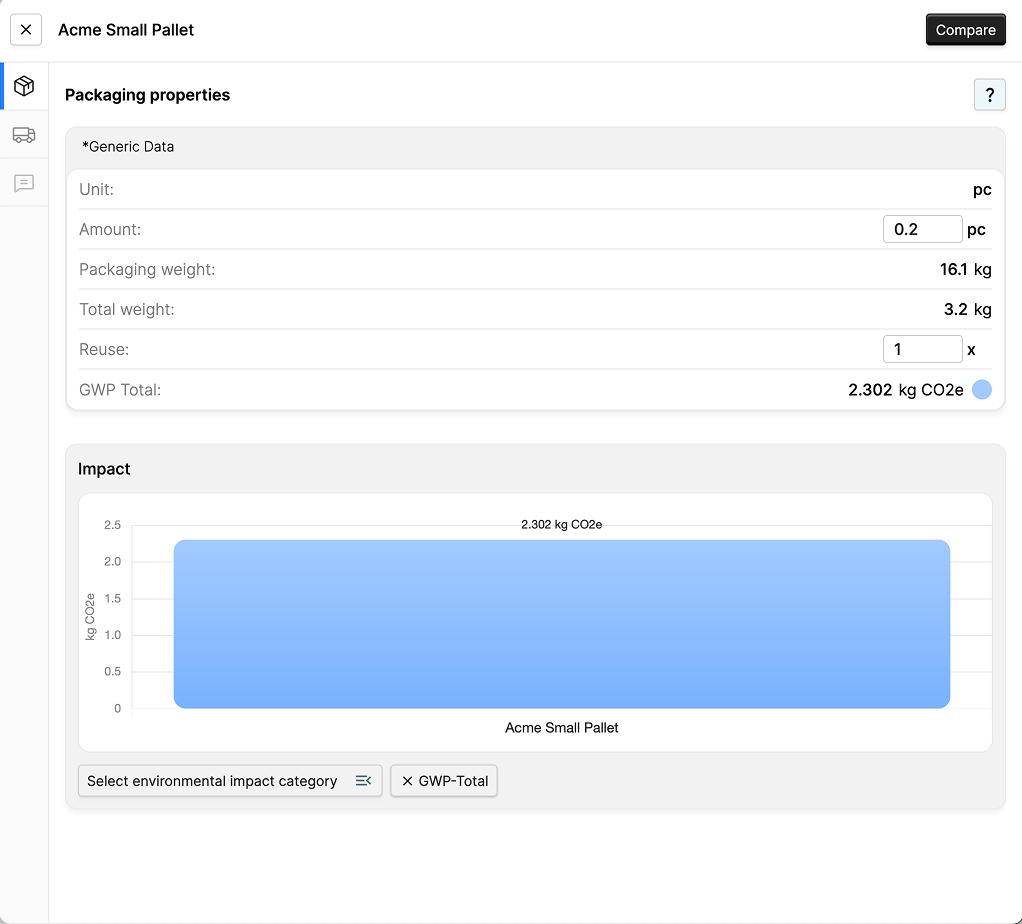
The packaging sidepanel
To easier edit the added packaging data, click the Edit button.

This will open the packaging sidepanel:
Editing the right data
The side panel only lets you edit the packaging data for the product you're working on. To edit the packaging itself, click its name in the "Packaging" table or go to the Packaging page.
On the left edge of the sidepanel you can find two tabs:
1. Entity data
Shows all data for the packaging. Some of the fields will be editable.
All fields that start with * are using generic data. Adding the correct data here will improve the data quality of the product.
In this tab you can also find a graph with the environmental impact of the packaging.
2. Comments
Shows all comments for the packaging. These comments are only tied to the packaging in the product. They will not show up in the comments on the Packaging page.
Further reading
Read more about packaging, what it is and how it is created here.
Managing factories
Default factories
You can create products without adding any factories to them.
If you don't add any factory entities to a product, EandoX will use default factory data. This will lower the products data quality, and might make your environmental impact score worse.
In the Factories section, click the Add factory button.

This will open a sidepanel where you can search for all factories that are available in your catalog.

Nothing in the list?
If this list is empty, you need to create a factory first.
Select the factories you want to add. Then click the Add factory button in the top right corner of the sidepanel. This will close the sidepanel and the factories you selected will show up in the table of added factories.

The table has the following columns:
| Column name | Column description |
|---|---|
| Name | The name of the factory. Clicking the name will open the editing page for the factory. |
| Division | How much of the product is produced in this factory, in percentage. |
| Data quality | The data quality of the factory. |
| Edit | A button that opens a sidepanel where you can see and edit all settings for the factory. |
Removing factories
To remove a factory from the product, hover over the name, and tick the checkbox that appears in front of the name. Select all factories you want to remove and click the Delete button in the factory section header.
The factory sidepanel
To easier edit the added factory data, click the Edit button.

This will open the factory sidepanel:

Editing the right data
The side panel only lets you edit the factory data for the product you're working on. To edit the factory itself, click its name in the "Factories" table or go to the Factories page.
On the left edge of the sidepanel you can find two tabs:
1. Entity data
Shows all data for the factory. Some of the fields will be editable.
This tab also shows a graph with the environmental impact of the factory.
2. Comments
Shows all comments for the factory.
Further reading
Read more about factories, what they are and how they are created here.
Relations
In the Relations section, you can see all components and products where this product is used.
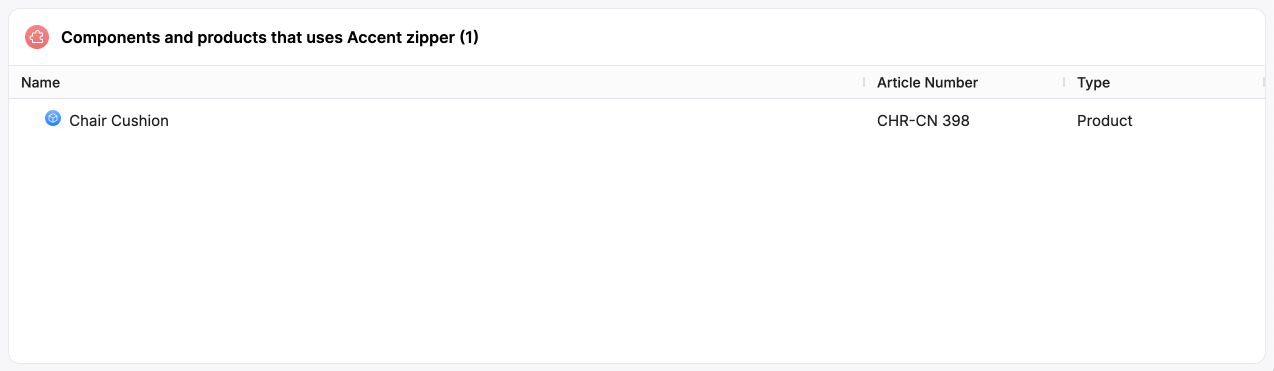
This section is only presentational, and can not be interacted with. It's there for you to see how your product relate to the rest of the products in your catalog.
Visualizing these relationships helps you understand how changes to one product impact others. It can also guide you toward products that might need further review or updates after your changes are applied.
Custom fields
Custom fields are fields that are not part of the LCA itself, but are used to store additional information about the product. This could be the CPC code, external supplier details, or who is in charge of maintaining the product.
To see the custom fields for a product, click the Edit dropdown in the header of the product page, and select Edit custom fields. This will open a sidepanel where you can add and edit data in the custom fields.
No custom fields?
If you don't see any custom fields in the sidepanel, you can add them on the Settings page.
Further reading
Read more about custom fields, what they are and how they are created here.
Saving and publishing products
This entity can be both internal and external, and therefore supports both saving and publishing.
Internal and external entities
An internal enitity means that it can only be accessed within your own company and team.
An external entity means that it can be accessed by other companies connected to EandoX. This is most often used when you are a supplier and want your customers to be able to access your components.
Saving
Click the Save button to save the changes you have made. If it is an external entity, the changes will not be published. This is a good way to create internal drafts, and then publish them later.
Don't lose your work
If you leave the page without saving, your changes will be lost. Make sure to save your work often.
Publishing
Clicking on the Publish button will save the changes you have made and then publish them. This will make the changes available to all other companies using this entity in their products.
Component deviation
Products and components are very similar in their creation process. Therefore this guide is used for both entities.
Components are however only internal, and can therefore not be published.