Improving your first product
This guide will walk you through the steps of enhancing the product you created in the first guide. You will be adding packaging and factory data, as well as learning how to create a reusable component out of the already added material. By the end of this tutorial, you'll have a product with more accurate data for your LCA and EPD.
Prerequisites
This guide assumes you have already created a basic product in EandoX. If you haven't done that yet, please start with the creating your first product guide.
We will be going over the following steps:
- Creating a reusable packaging entity
- Adding the created packaging to the product
- Creating a reusable factory entity
- Adding the created factory to the product
- Creating a reusable component from the added materials
Additional entities
This guide starts where the last one ended: you are working at the fictional company Acme Inc. that manufactures a product called Ball Valve: 
Most of the parts are manufactured and ordered from a supplier. The lever is a custom part that is manufactured by Acme Inc themselves. All of these parts are assembled into the final product at a factory called Acme Inc Assembly Facility.
The previous guide was all about adding the components and materials for the Ball Valve. In this guide we will enhance the the product with two optional but important entities:
Packaging: The materials and containers used to package your productFactories: The facilities where your product is manufactured
Adding these entities will improve your product's environmental impact calculations, data quality scores, and lifecycle traceability.
Creating entities will also make it easier to update multiple products in the future: you will only need to update the entity once, and the changes will be reflected in all the products that use it.
Let's begin.
Creating a packaging
The Ball Valve is sold in boxes, so our first step is to create these boxes in EandoX. This process is nearly identical to creating a product with materials, but is done on the Packaging page.
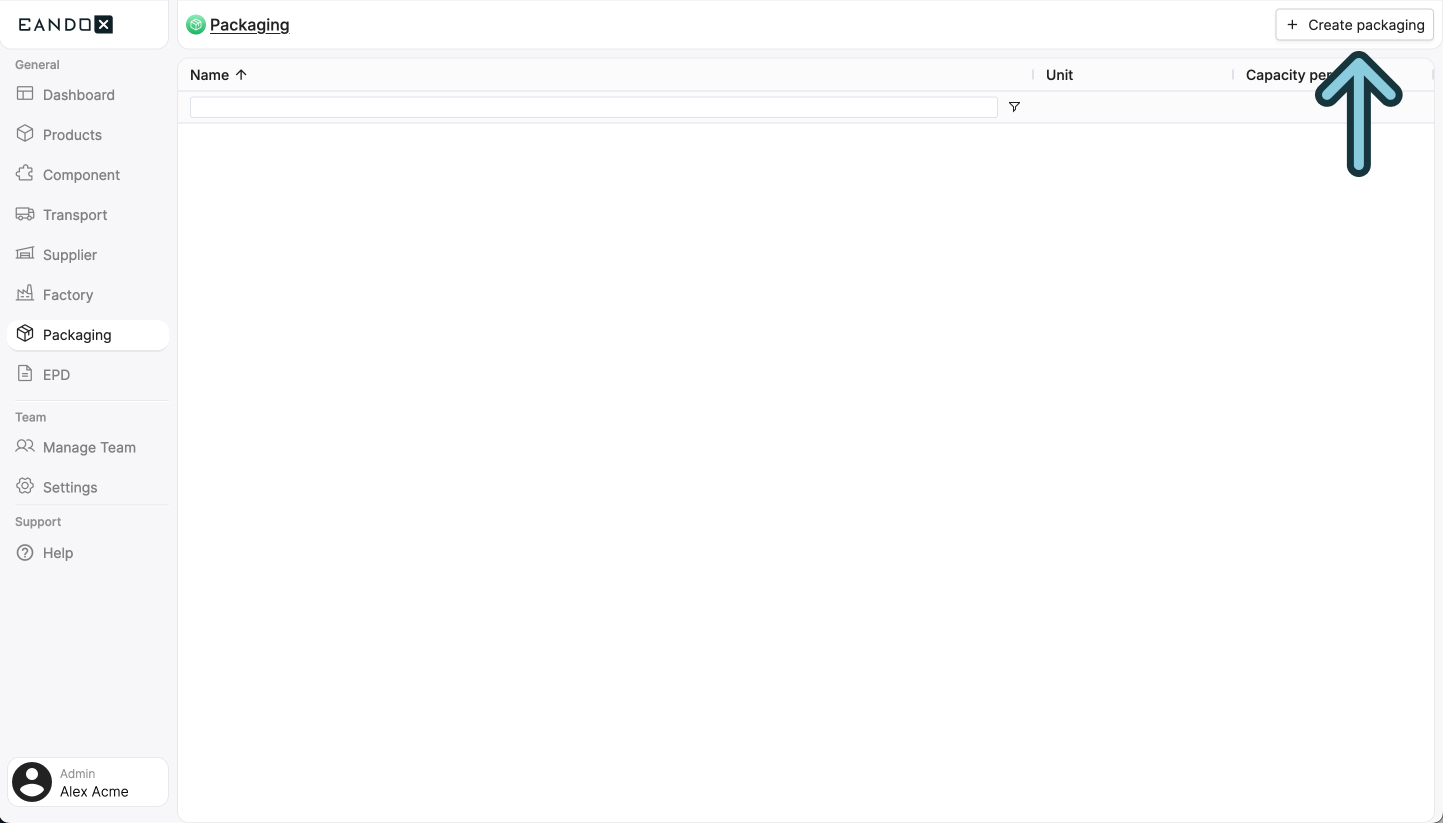
Navigate to the Packaging page in the left navigation menu, and click the Create packaging button in the top right corner.
This will open a sidepanel where you can fill out the necessary information about your packaging. This information can be changed later on, but it is recommended to fill it out correctly the first time.

The fields in the sidepanel are as follows:
| Field name | Field description |
|---|---|
| Packaging name | The name of the packaging. |
| Article number | This is used to identify the packaging, so it should be unique. |
| Functional unit | The unit in which the packaging is used. |
Name this packaging Small Cardboard Box, add a unique article number and set the functional unit to Piece - pc.
Make sure to pick the right functional unit
The functional unit is the unit in which the product is used. For our Small Cardboard Box the unit Piece - pc is the most fitting, since it will be used in the form of a single unit.
If the packaging would instead be something like a Paper Wrapping or Foam Pellets, a unit of Meter - m or Kilogram - kg would be more appropriate.
Click Confirm to create the packaging.
This will take you to the packaging page where you can add the components and materials making up the packaging. This process is identical to how you added the data for the Ball Valve in the last guide.
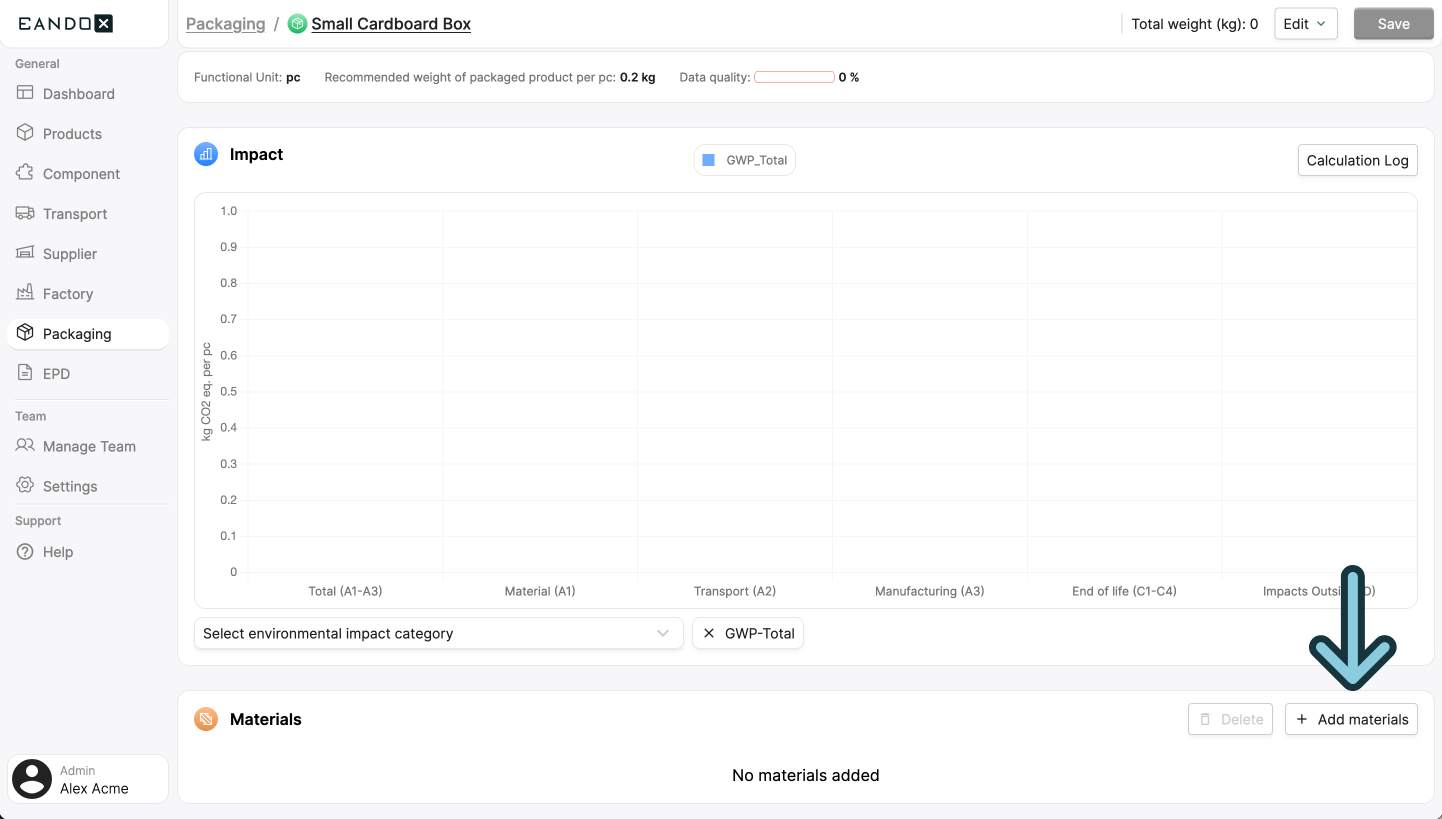
With all the data added, you can save the packaging. This will make it available for you to use in your products.
Adding the packaging
Now that the packaging is created, we can add it to the product.
Navigate to the Products page in the left navigation menu, and click the product you want to add the packaging to. In this case we're going back to the Ball Valve.
Scroll down to the Packaging section, and click the Add packaging button.

This will open a sidepanel where you can search for all packaging that is available in your catalog and library.
Library vs catalog
The term Catalog is used when speaking about the collection of products, components, packaging, and factories created by your company.
The Library contains products created by external suppliers.
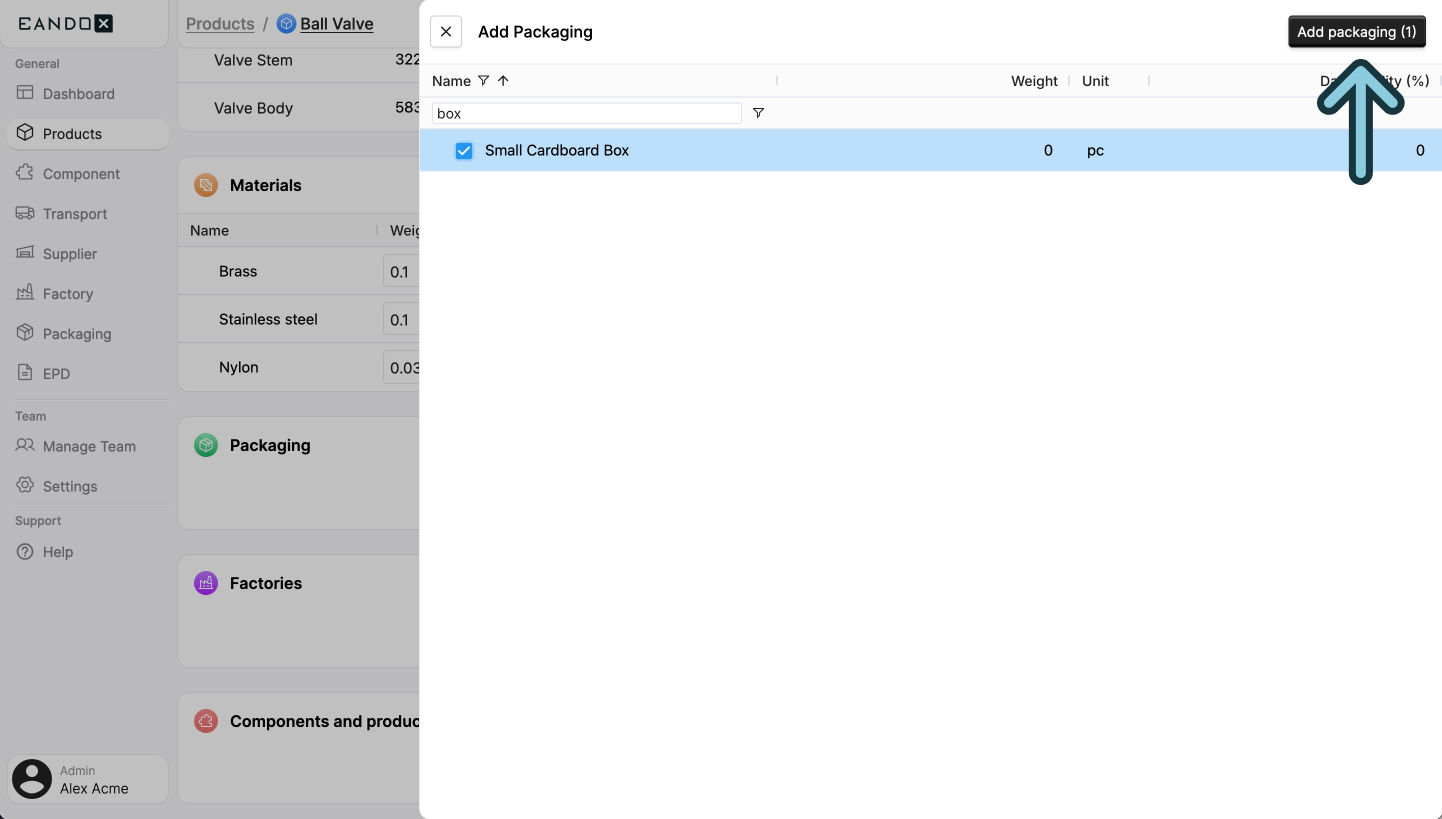
Find the Small Cardboard Box you just created, and click the Add packaging button in the top right corner.
This will close the sidepanel and the packaging you selected will show up in the table of added packaging.

Since one unit of the Ball Valve is packaged in one box, we can leave the Amount field as it is.
More on packaging
In this example we only added one box, but you can add as much packaging as you need.
Some products might be sold in one main box, containing all its parts in individual smaller bags and boxes.
Other products might be shipped on pallets, where one piece of the product only takes up 1% of a full pallet.
Creating a factory
The last step in improving the Ball Valve data is to add a factory. This is the location where the product is manufactured and/or assembled.
In our example with the Ball Valve, we have two factories: one that manufactures the custom lever, and one that assembles and packages the lever and the rest of the components.
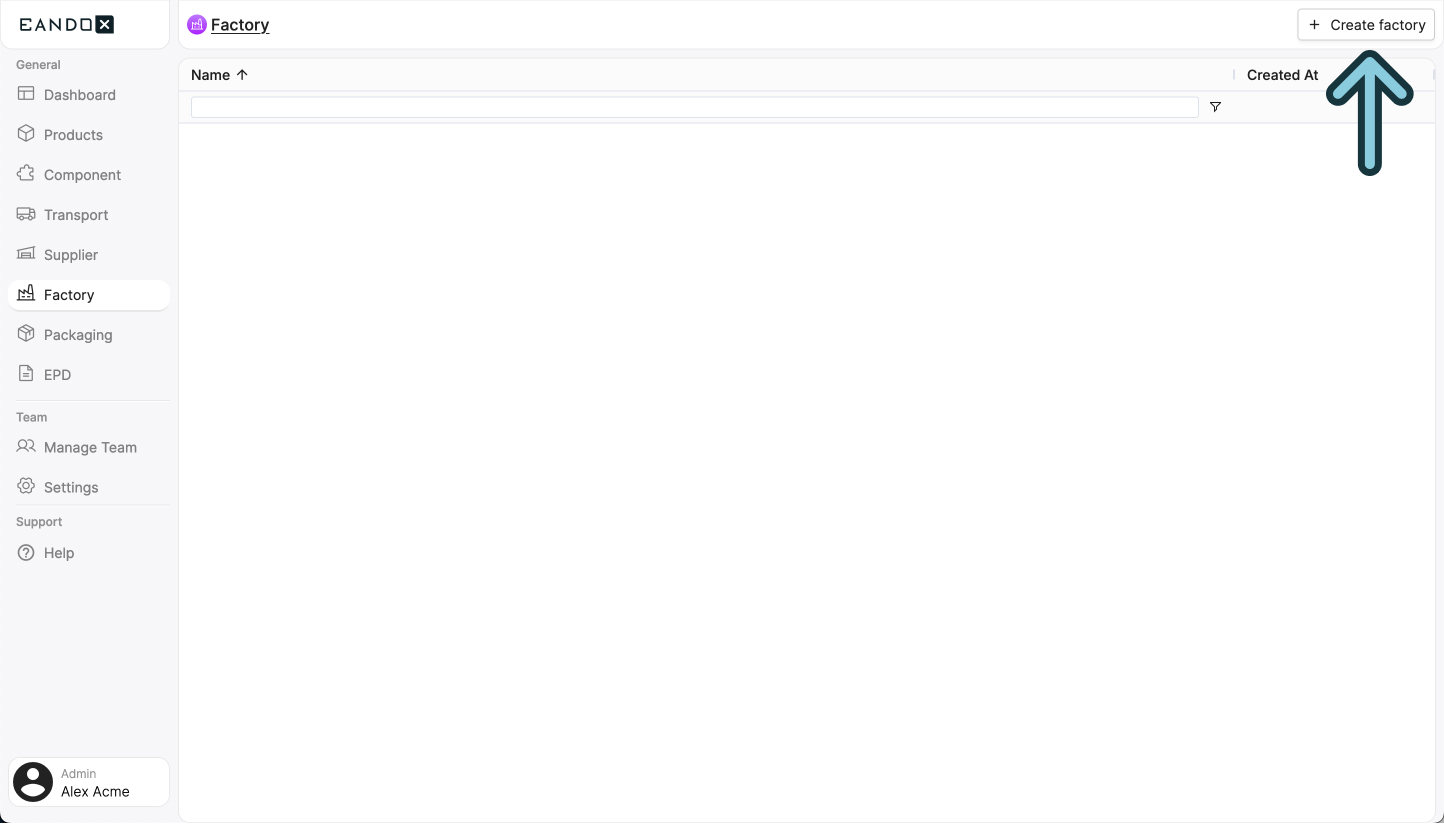
Navigate to the Factories page in the left navigation menu, and click the Create factory button in the top right corner:
This will open a sidepanel where you can fill out the necessary information about your factory. This information can be changed later on, but it is recommended to fill it out correctly the first time.
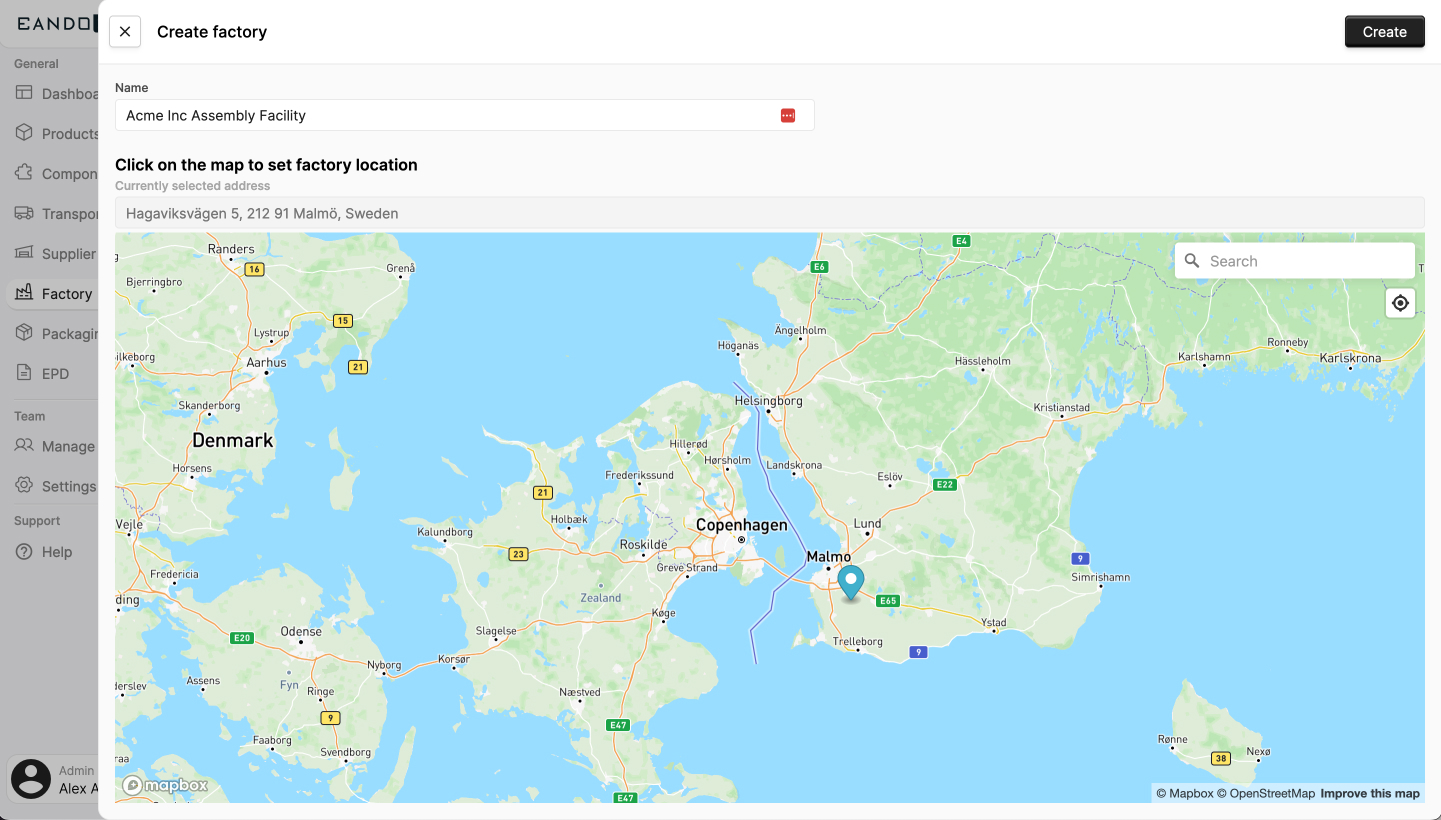
The fields in the sidepanel are as follows:
| Field name | Field description |
|---|---|
| Name | The name of the factory. |
| Factory location | The location of the factory. You can use the search input to search for the address. |
Click Create to create the factory.
In this example we don't have any additional data on the factory, so we will leave it like this for now. In the future, we can contact the factory, ask for their data, and update it in the factory entity. For now, just knowing the location of the factory helps us a lot when it comes to the default transportation data.
Click Save and repeat the process for the other factory.

Adding the factories to the product
We can now add the factories to the product.
Navigate to the Products page in the left navigation menu, and click the product you want to add the factories to. In this case we're going back to the Ball Valve.
Scroll down to the Factories section, and click the Add factory button.

This will open a sidepanel where you can search for all factories that are available in your library.
Select the factories you want to add. Then click the Add factory button in the top right corner of the sidepanel.

This will close the sidepanel and the factories you selected will show up in the table of added factories.

We now need to fill out the division between the two factories. This how much of the production process is done in what factory.
In our case the Acme Lever Factory GmbH does 70% of the job, and the Acme Inc Assembly Facility does the rest.

Bonus: creating a component from your products materials
You can leave the product process at this, but since we just talked about keeping the data up to date, we can also create a component from the materials that are used in the product.
In the Ball Valve example, this could be useful if we have other products that use the same custom lever. Making it into a component will allow you to reuse the same lever data in other products (similar to how it works with supplier components).
Thinking ahead
If you know that you will be reusing a component before creating a product, you can create it first, and then add it to the product later on.
Navigate to the Products page in the left navigation menu, and click the product that holds the materials you want to extract to a component. In this case we're going back to the Ball Valve.
Scroll down to the Materials section, and select the materials relevant to the component you want to create. In this case we're going to select all of them, since all the material we added is used in the lever.

Then, click the Create component button in the top right corner.
This will open up a sidepanel where you can fill out the necessary information about your component. All the fields are the same as when creating a product.
Tweaking the weights
This sidepanel also has fields for changing the material weights. This is useful if you know that only part of the material is used in the component, and the rest is used for something else in the product.
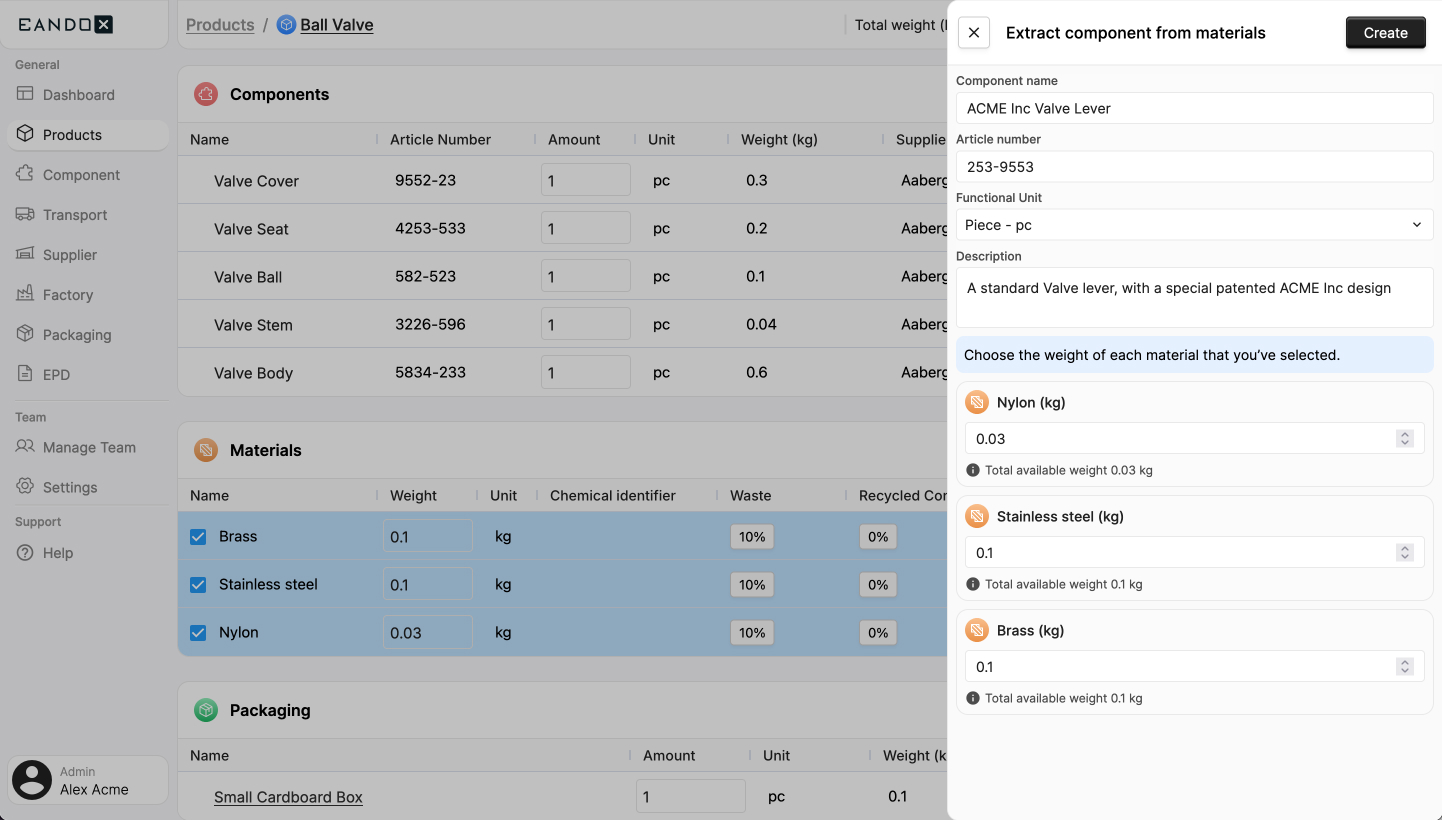
Click Confirm to create the component. This will close the side panel, add it to the component section, and remove the materials since they are now part of the component.
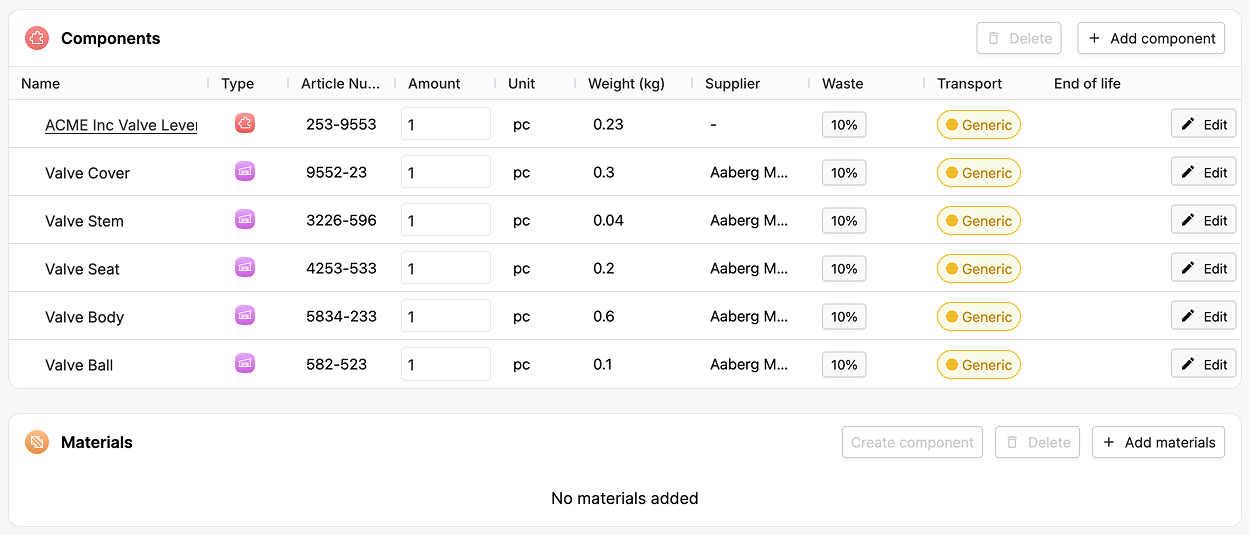
The ACME Inc Valve Lever will also be available for inspection and editing on the Components page (in the left navigation menu).
Don't forget the factory!
The materials for the ACME Inc Valve Lever were added to the component, but the Acme Lever Factory GmbH (that manufactures the lever) was not.
To fix this, remove the factory from the Ball Valve product, set the Acme Inc Assembly Facility division to 100%, and then update the ACME Inc Valve Lever component to include the Acme Lever Factory GmbH.
Learn more
This guide has only scratched the surface of what you can do with products.
Read more about products here.