EandoX Co-Pilot
EandoX Co-Pilot revolutionizes your product data management workflow through its conversational interface. Upload your already existing product data as PDF and spreadsheets of any complexity, and let Co-Pilot automatically convert it into ready-to-use products and components. Enter the data of your entire product catalogue in minutes, instead of days.
Still in beta
Please note that EandoX Co-Pilot is currently in beta phase and under active development. As a result, there may be some discrepancies between this documentation and the actual functionality of Co-Pilot. We greatly appreciate your patience and welcome any feedback during this development period.
Can't access Co-Pilot?
We're rolling out Co-Pilot in phases as a premium feature. If you don't have access yet but would like to try it out, please reach out to your EandoX representative, or to the support team at support@eandox.com.
The Co-Pilot workflow
Working with EandoX Co-Pilot is similar to how you would work with a human colleague. Let's take a quick look at the overall workflow before we dive into the details:
- Create a new Co-Pilot session and upload the product data you want the AI to work with.
- After Co-Pilot has processed the data, you can start chatting to it about what you want it to do.
- Co-Pilot will take your requests and propose a solution on the Blueprint Canvas. Keep chatting to refine the proposed work.
- When you are happy with the plan you can apply it to your data. You will be presented with a list of all the changes that will be made to your EandoX library, so that you can make sure everything looks right before any data is changed.
This workflow allows you to confidently make big changes, without having to do all the manual work yourself.
Starting a new Co-Pilot session
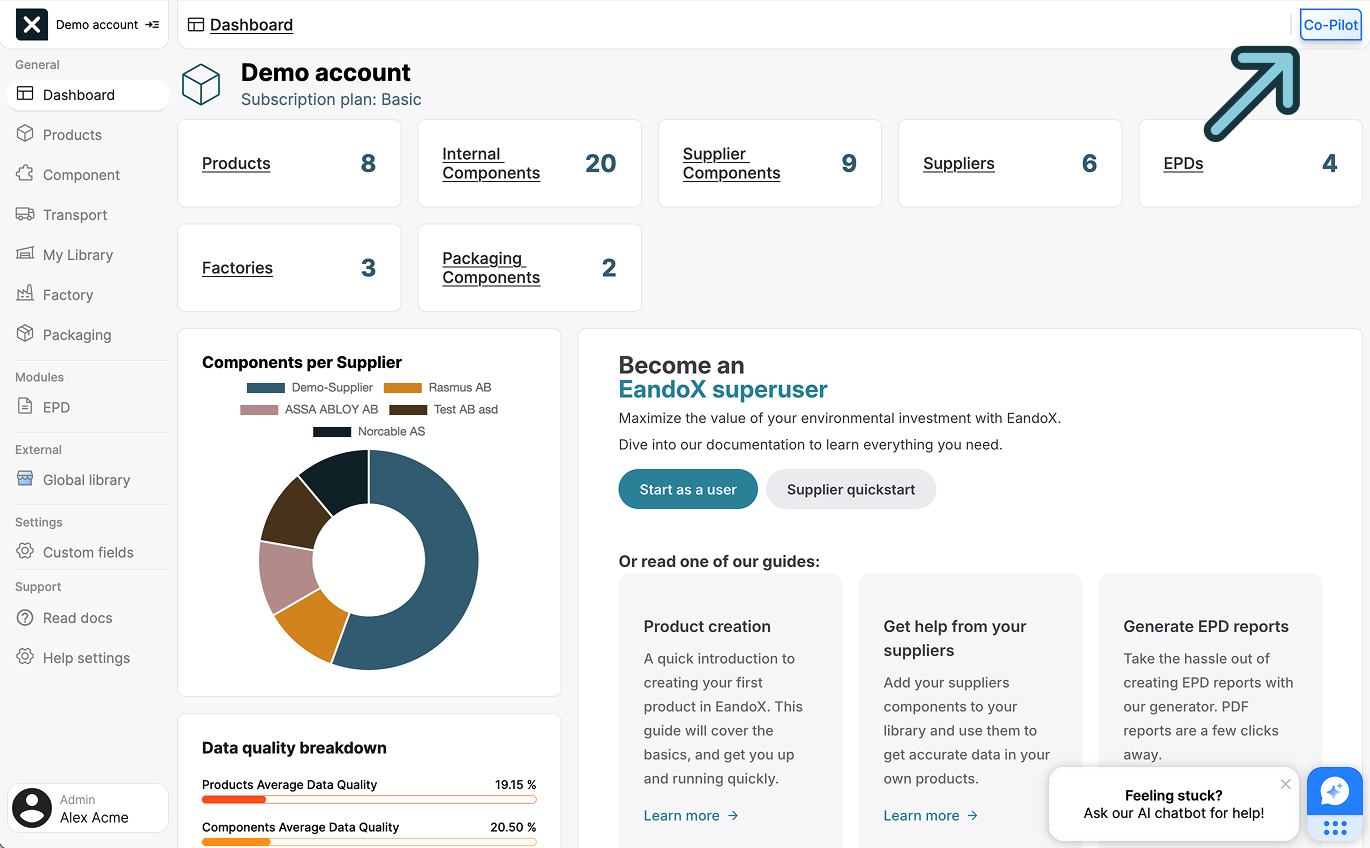
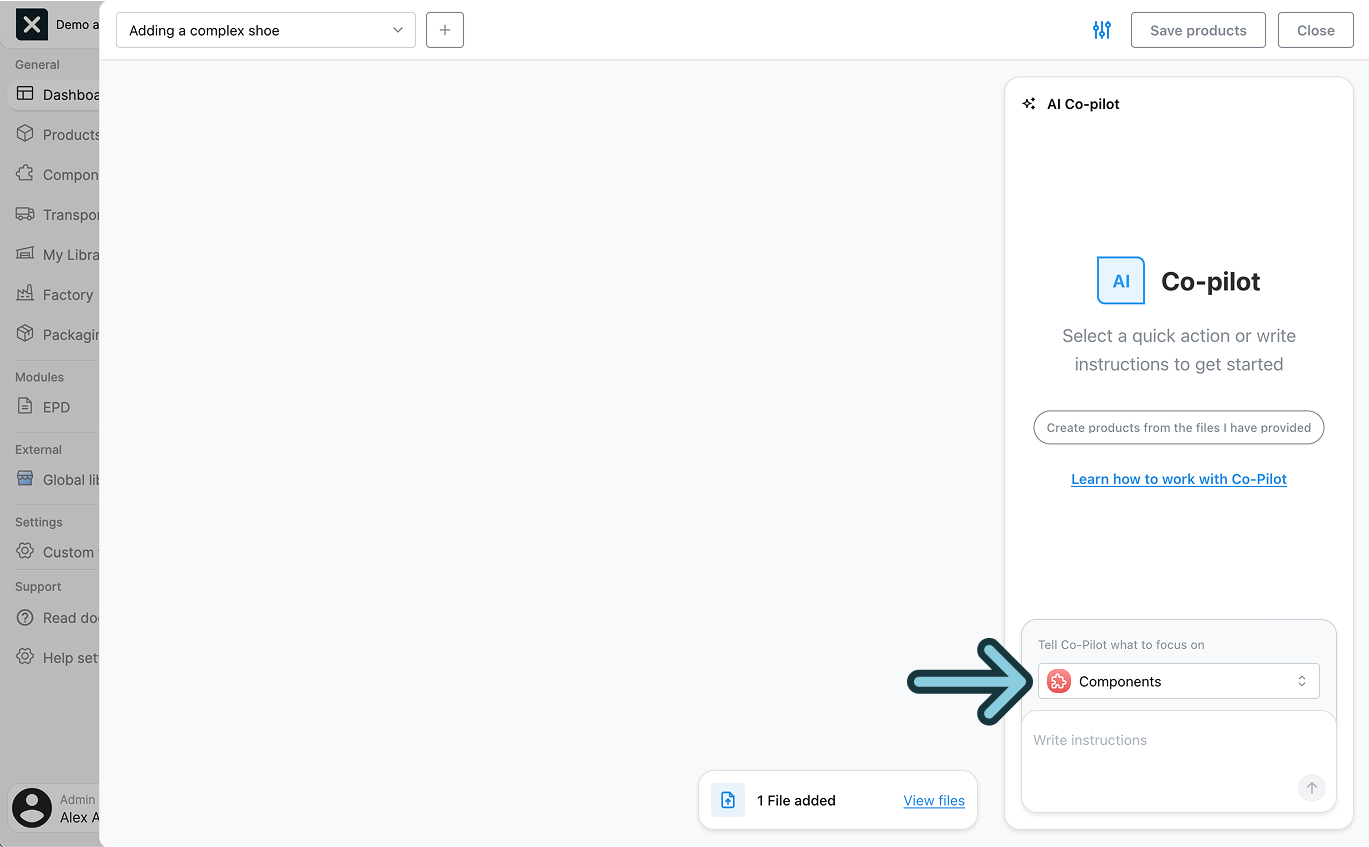
To get started with EandoX Co-Pilot, click the Co-Pilot button in the top right corner of the page.
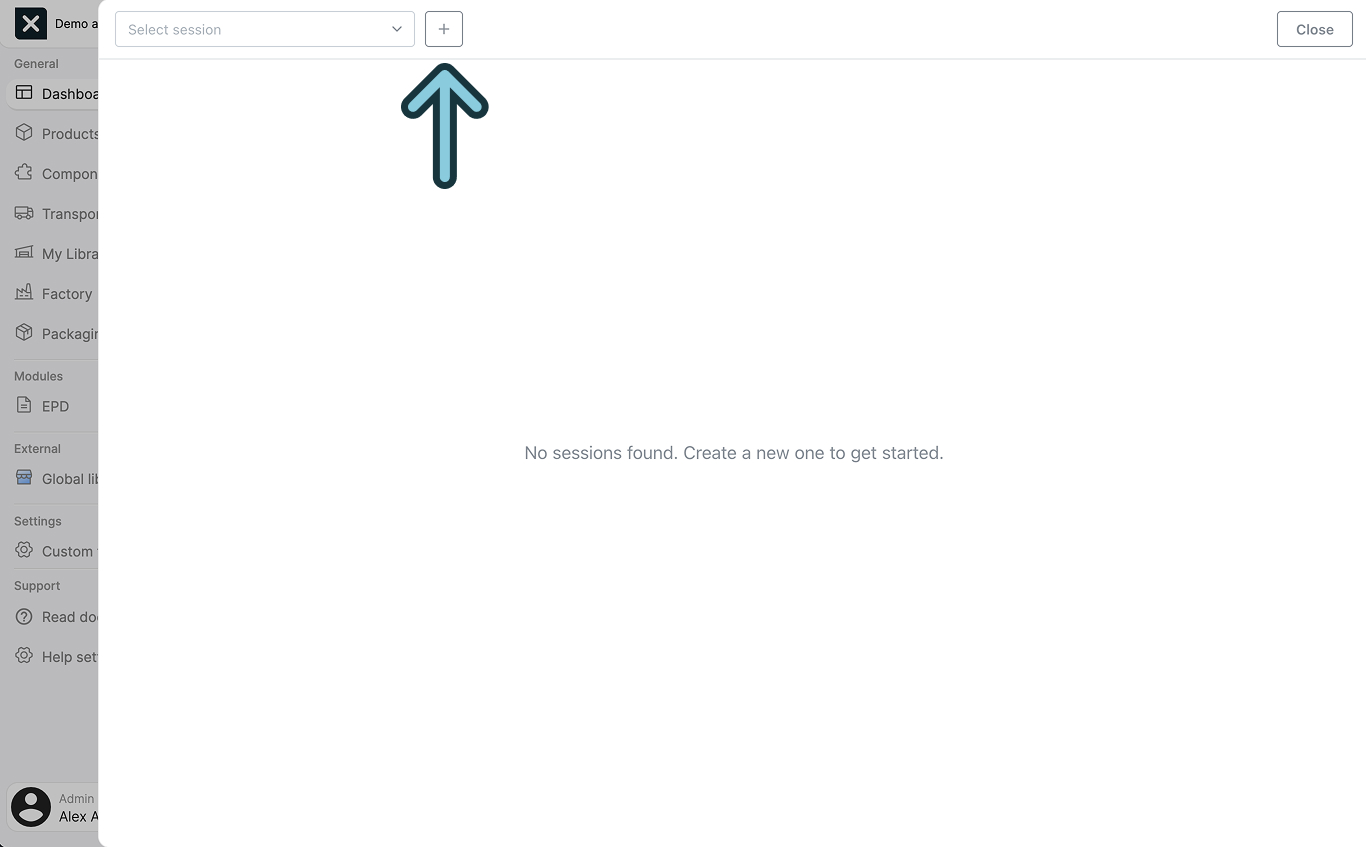
This will open up the Co-Pilot sidebar. If this is your first time using Co-Pilot, this will be empty.
Working in sessions
Co-Pilot uses sessions to help you manage multiple tasks efficiently. Each session maintains its own history and progress, allowing you to switch between different tasks or review past work. Sessions are automatically saved and can be accessed again at any time.
To start a new session, click the + button in the sidebar header to show the creation popup.
Give your session a descriptive name that reflects its purpose. This will make it easy to find and resume your work later. Once you've entered the name, click Create session to begin.
You session will be created, and opened in the sidepanel.
The Co-Pilot sidepanel
When a co-pilot session is open, you will see four main components:
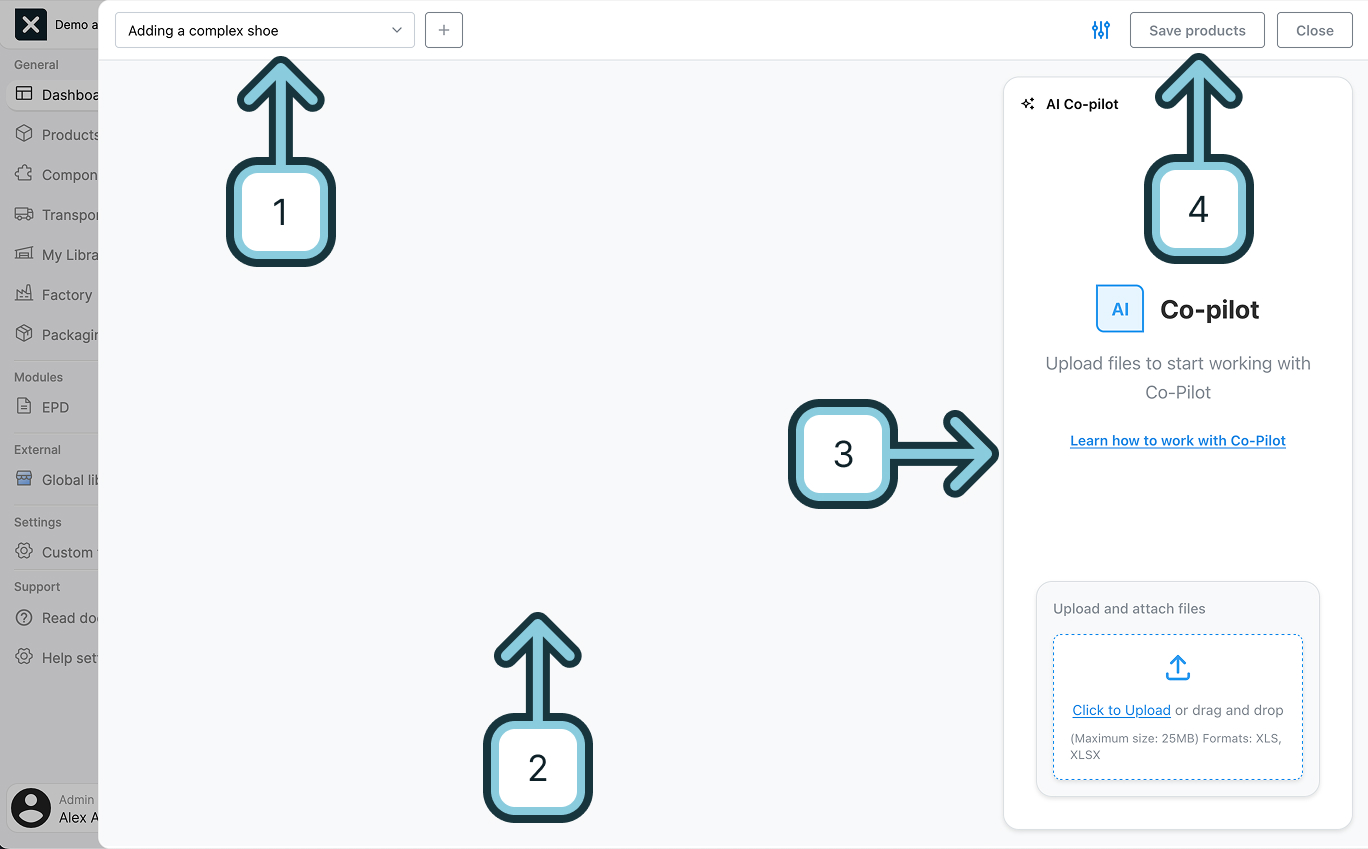
- Session selector: This is where you navigate between your different Co-Pilot sessions or create new ones.
- Blueprint canvas: This is where you preview and review all changes that Co-Pilot proposes before they're implemented in your library.
- Chat window: This is where you chat with Co-Pilot, and ask questions, request changes, and guide the AI's work.
- Save button: Once you're satisfied with the proposed changes in the Blueprint Canvas, use the save button to initiate the review process. This gives you a final opportunity to verify all modifications before they are permanently applied to your EandoX library.
Uploading product data
Before Co-Pilot can do anything, it needs to have access the product data you want to work with. The chat window will prompt you to upload product related files.

You can upload multiple files at once, and they will be processed together. The supported file types are PDF, XLSX, and XLS.
More data is better
Like a human colleague, Co-Pilot works best with comprehensive data, but with the added benefit of processing it in minutes rather than hours or days.
For the best results, it's important with both quantitative data (specifications, materials, measurements) and qualitative information (descriptions, context) to help Co-Pilot fully understand your products and make more informed suggestions.
You can view what files are currently uploaded, add new files, or remove existing ones by clicking the file bar next to the chat window:

Working with the product data
Once your files are uploaded, you can start interacting with Co-Pilot through the chat interface. Type your own messages in the chat window, or use the suggested quick-action buttons that appear during the conversation to guide Co-Pilot in processing your product data.
Leverage your existing library
The AI is aware of all entities that already exist in your EandoX library. This lets you leverage previously created assets, while building new ones.
Once you give Co-Pilot a task, it will start processing your request. The chat will be temporarily paused while the AI works on a solution. As soon as it's ready, Co-Pilot will provide a summary of its actions, and you'll see the proposed modifications displayed on the Blueprint Canvas, ready for your review:
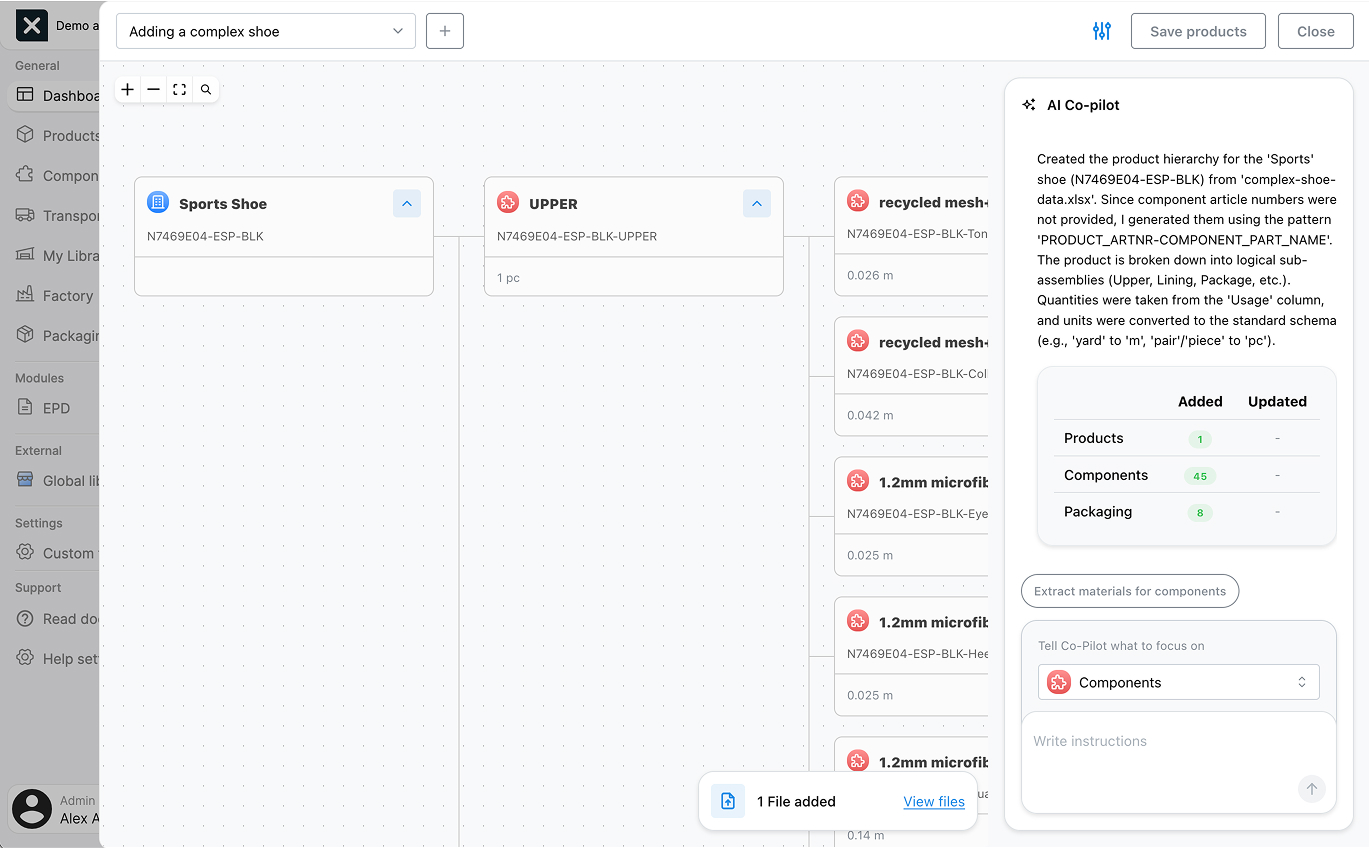
Understanding the Blueprint
The Blueprint Canvas acts as a preview. It shows the proposed changes to your EandoX library, without modifying your data.
Think of it as a planning board where you can review and refine the AI's suggestions before committing any changes to your EandoX library.This ensures you maintain full control over how your data is modified.
Focus areas
When tasking Co-Pilot it's important to consider the focus area of the task. The focus area determines which part of the product data Co-Pilot will work with, and give it additional context of how to handle your request.
An example
If you're working with materials but have the Components focus area selected, Co-Pilot may misinterpret your request as being about components. To ensure accurate results, always verify that you've selected the appropriate focus area for your task.
You change the focus area using the focus area selector in the chat window:
The four focus areas are Components, Materials, Transport and Factories.
Quick-action buttons
Quick-action buttons in the chat window automatically provide the necessary context to the AI, so you don't need to worry about selecting the correct focus area when using them.
Adding specific context
If you want Co-Pilot to work on specific parts of the proposed changes, you can add Blueprint Nodes to the chat context. Simply click on any node you want to include. It will be highlighted with a blue border in the Blueprint Canvas, and its name will appear above the chat text input.
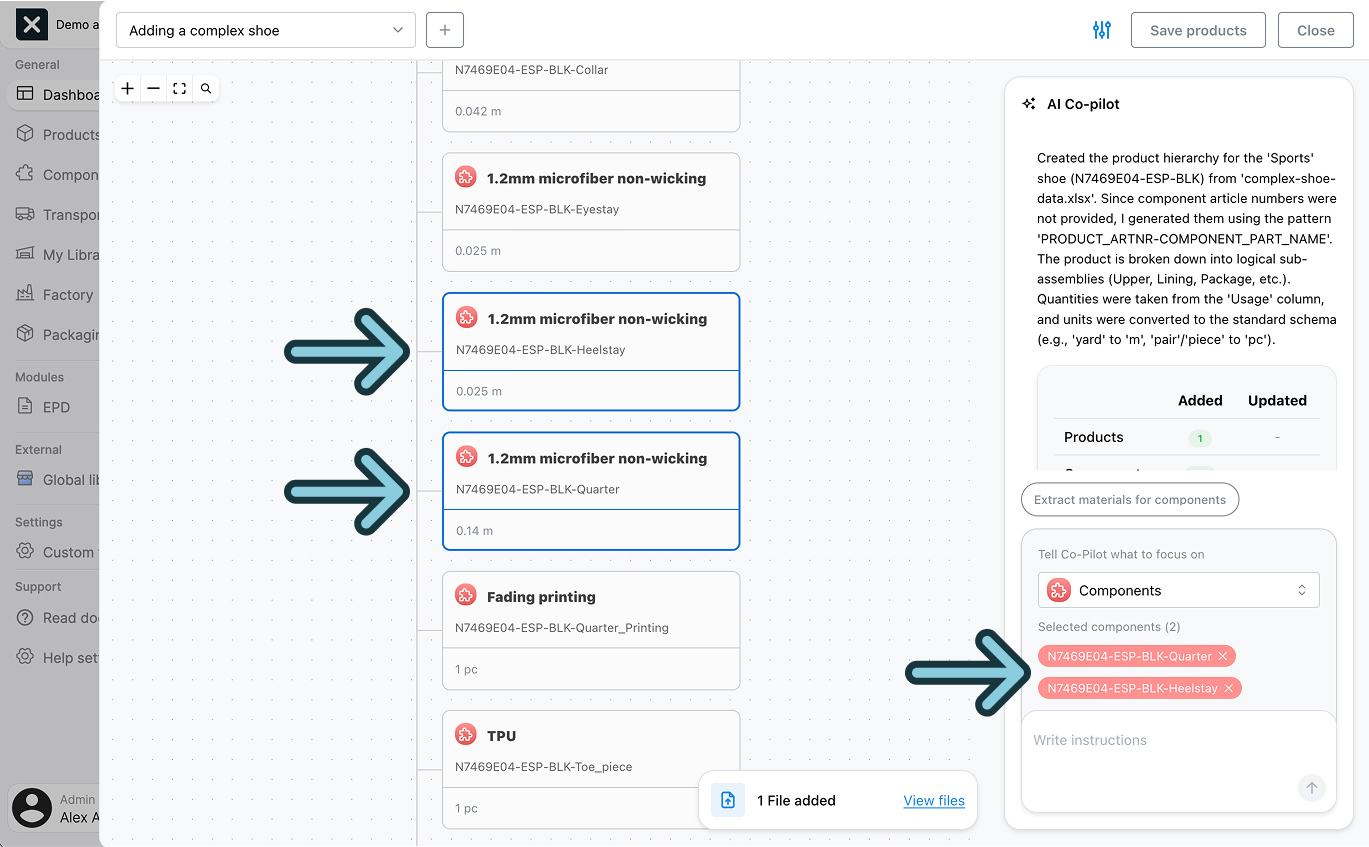
If you need to remove a node from the context, either click the node again to deselect it, or click the x next to its name above the chat input.
Partial support
Currently, only certain Blueprint Nodes can be added to the chat context. We are actively working on expanding support to include more relevant node types.
Saving the changes
When you're happy with the proposed changes in the Blueprint Canvas, it's time to apply them to your library.
Click the Save products button.
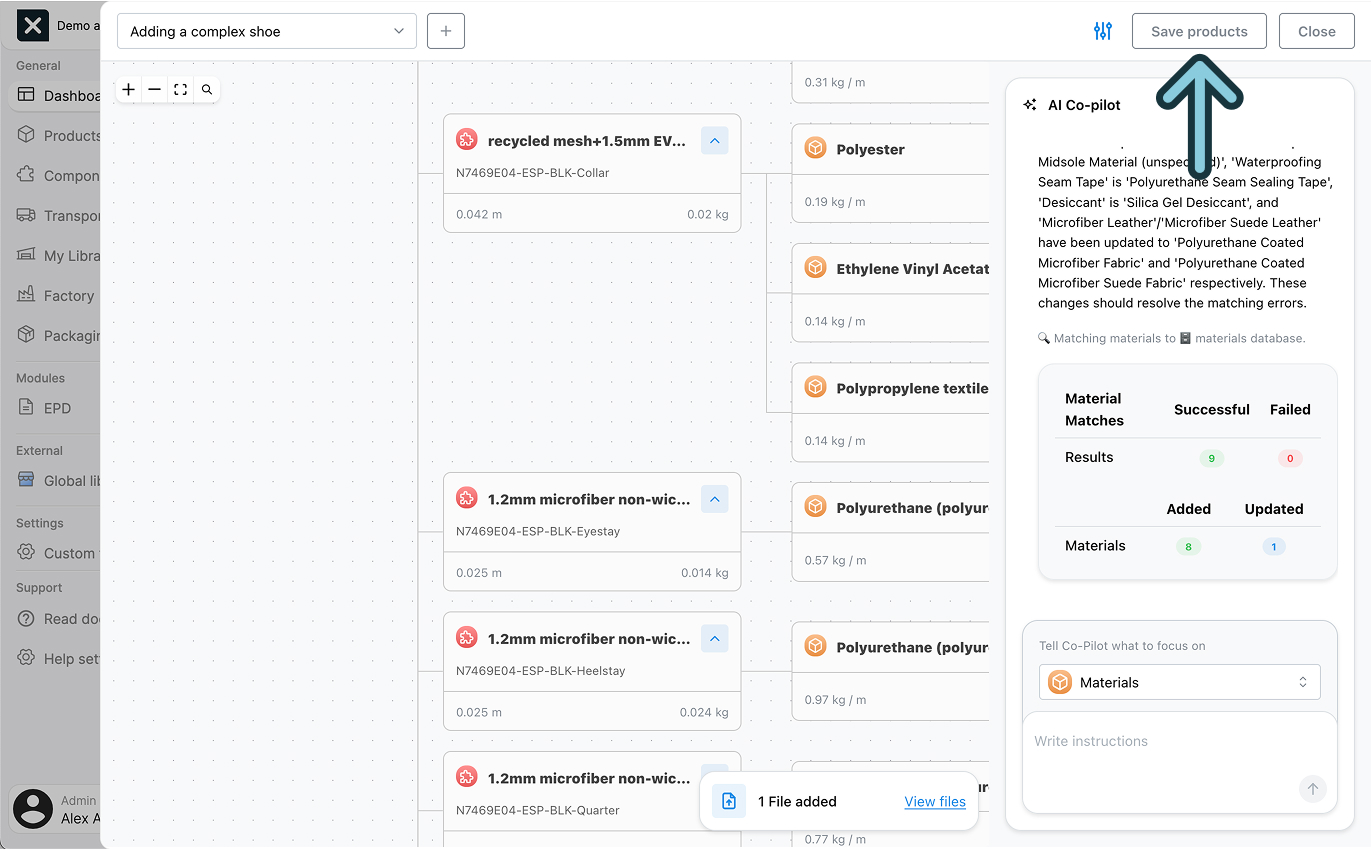
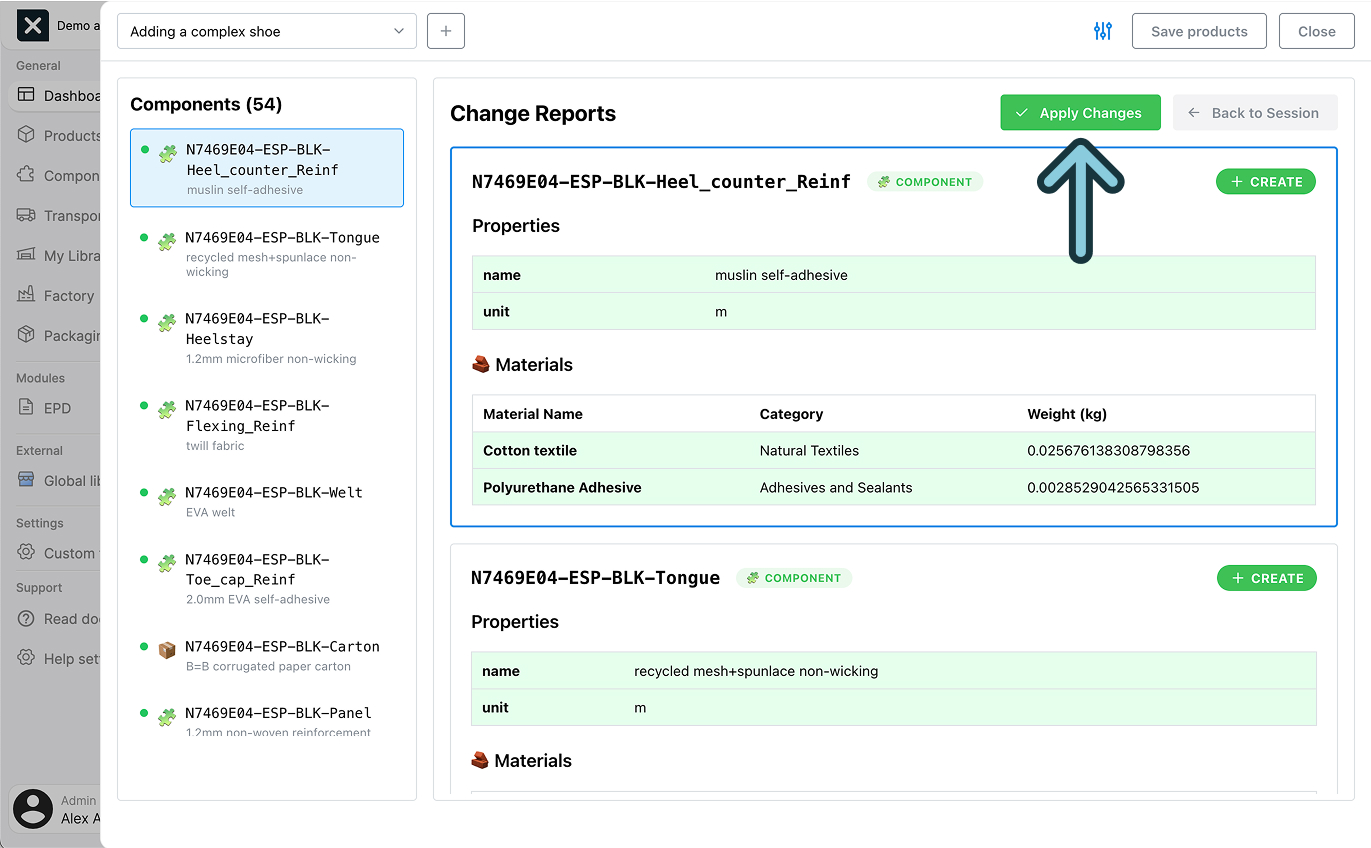
This will prompt Co-Pilot to analyze how the proposed changes should be implemented. Then, you will be taken to the Change Report for a final review.

The Change Report provides a detailed rundown of how your data will be modified. It clearly highlights what will be created, modified, or deleted, with additions shown in green and removals in red for easy visual reference.
Once you've reviewed the changes, click the Apply Changes button to implement them in your library.
Co-Pilot will process the changes and automatically return you to the Session View when finished. From there, you can either continue working with your current data and session or begin a fresh task with a new session.
Next steps
EandoX Co-Pilot is still in its early days. We are working hard to improve its functionality and add more features. If you have any feedback or suggestions, please let us know at support@eandox.com.