Creating your first product
This guide will walk you through the steps of creating your first product in EandoX. By the end of the tutorial, you'll have a product with an LCA (Life Cycle Assessment) ready for generating an EPD (Environmental Product Declaration).
This is a quickstart
This guide will only be covering the basics of creating a product. To get the most out of EandoX, it is recommended to start with the workflow overview.
We will be going over the following steps:
- Creating a product
- Adding components from a supplier
- Adding materials for your in-house manufactured parts
The product you will create
In this example you are working for a company called Acme Inc. The product you manufacture is a Ball Valve. Here is a quick overview of the product:
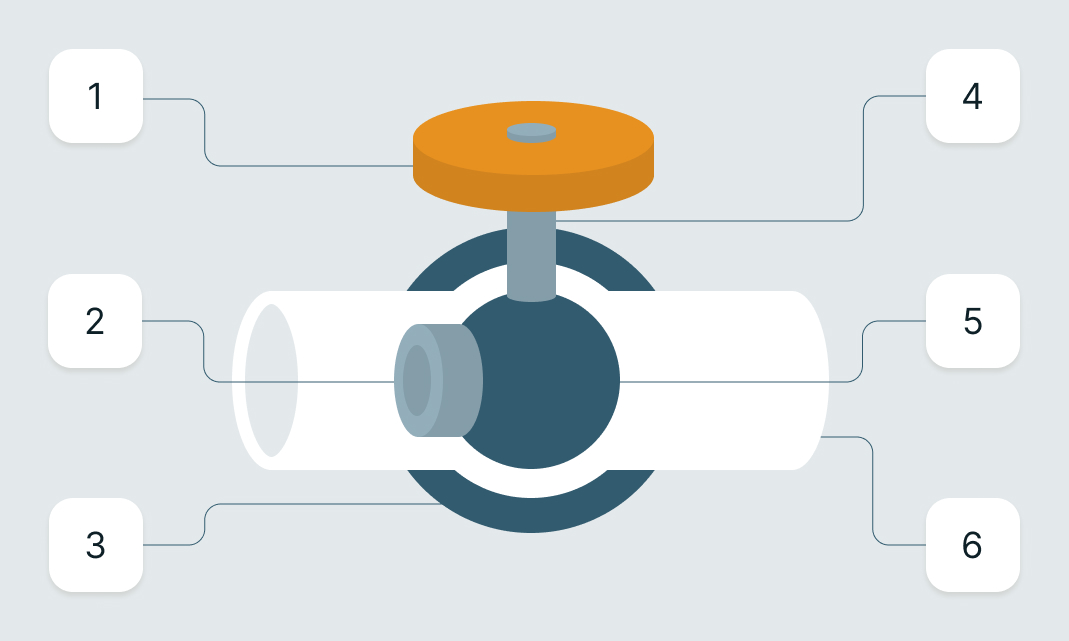
The product is made up of six individual parts:
- The lever
- The seat
- The cover
- The stem
- The ball
- The body
Most of these parts are manufactured and ordered from a supplier. The lever is a custom part that is manufactured by Acme Inc themselves. All of these parts are assembled into the final product at a factory called Acme Inc Assembly Facility.
Let us begin.
Adding supplier components to your library
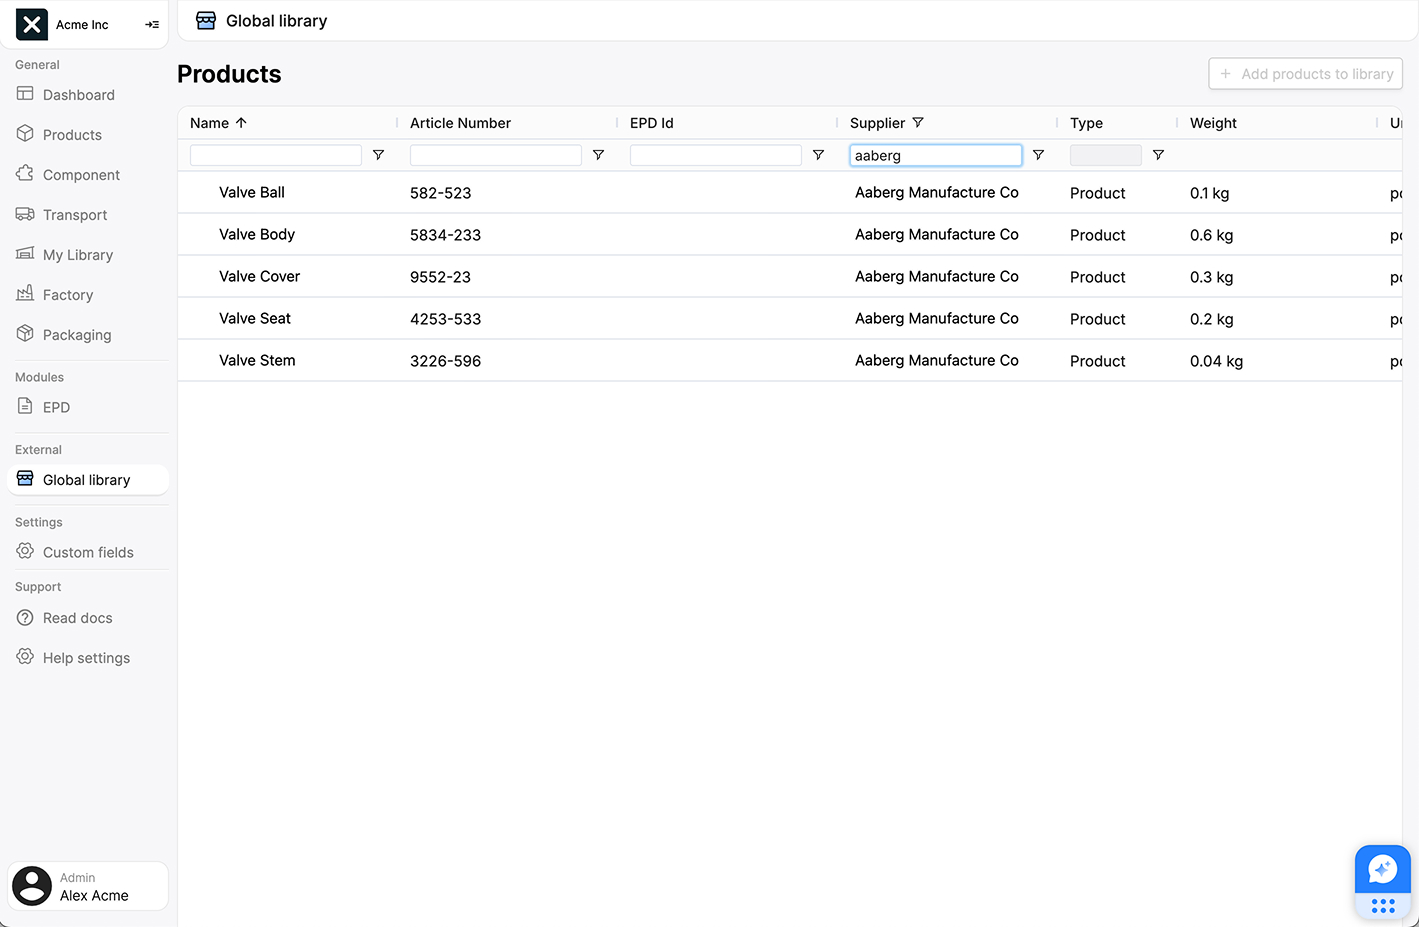
Five of the parts are made by a supplier called Aaberg Manufacture Co. Luckily for us, they are already part of EandoX, and have these components available for you to use from the Global Library.
Naming
Components created by suppliers are more commonly called Supplier Products. However, in this guide we will refer to them as components to make it easier to distinguish them from the product that you create yourself.
To see all the components they have made available for EandoX users, navigate to the Global Library page in the left navigation menu and search for Aaberg Manufacture Co in the Supplier column. This will show you all the components they have made available.
No connected supplier?
If the supplier you are looking for is not part of EandoX, you can invite them to join the platform by clicking the Invite new supplier button in the top right corner. This will open a sidepanel where you can enter the details of the supplier you want to invite, along with a message to send them.
Select the components you need (by checking the checkbox that shows up when hovering the item), and click the + Add products to library button to add them to your library.
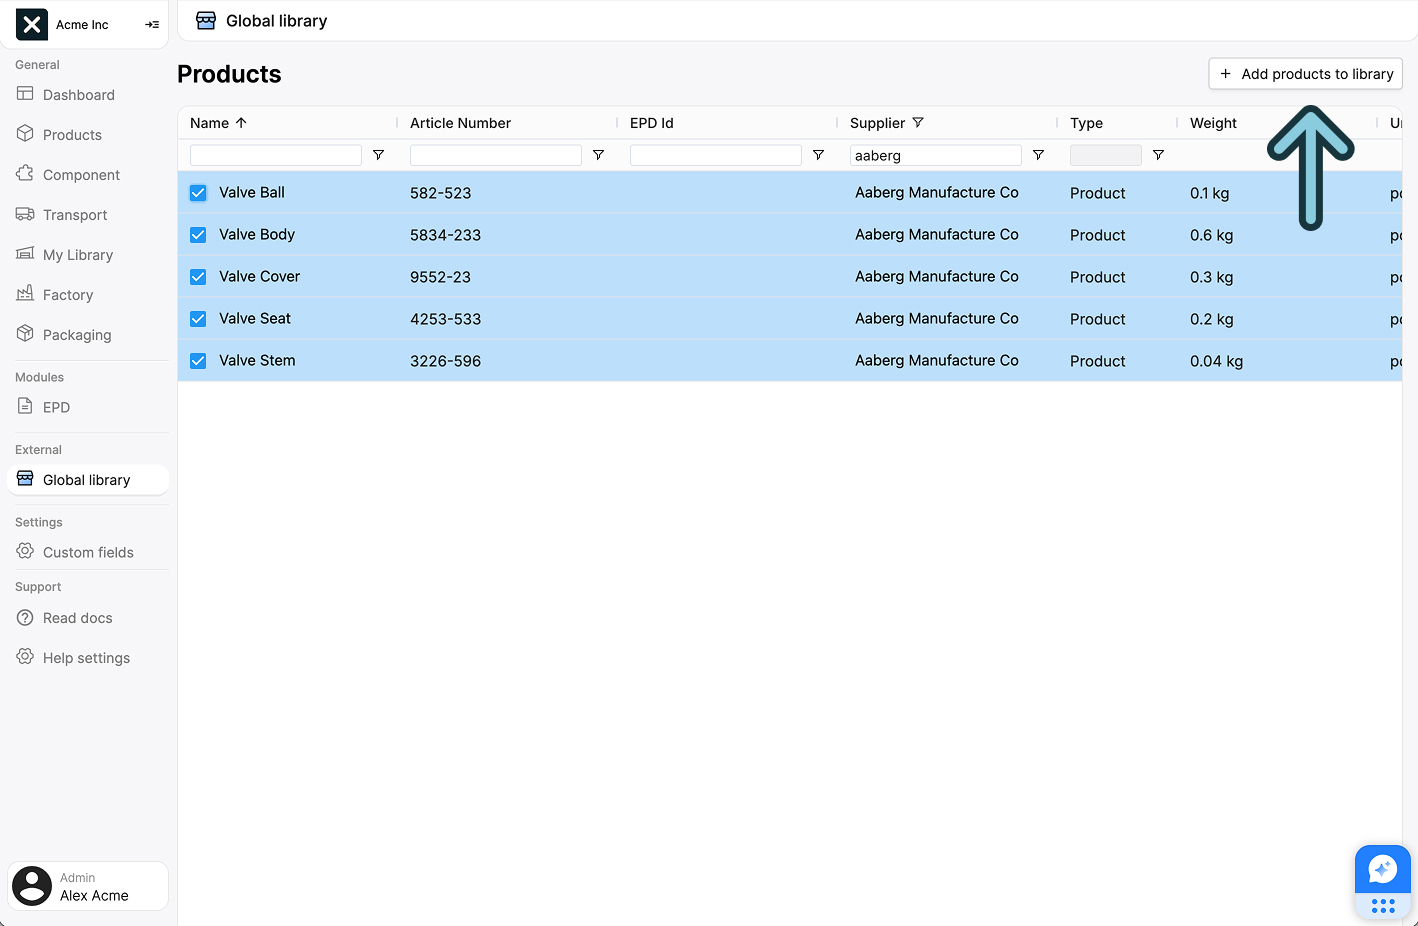
These components will now be available to you when you create new products. You will also be subscribed to component updates from Aaberg Manufacture Co.
No checkbox?
If you can't see a checkbox when hovering the item, it means that the supplier product has already been added to your library.
Can't find the components you need?
If a connected supplier hasn't created a component you order from them yet, you can send them a product request.
Read more about how to request a component here.
Creating a product
Now that we have the supplier components available, we can create your first product.
Navigate to the Products page in the left navigation menu, and click the Create product button in the top right corner.
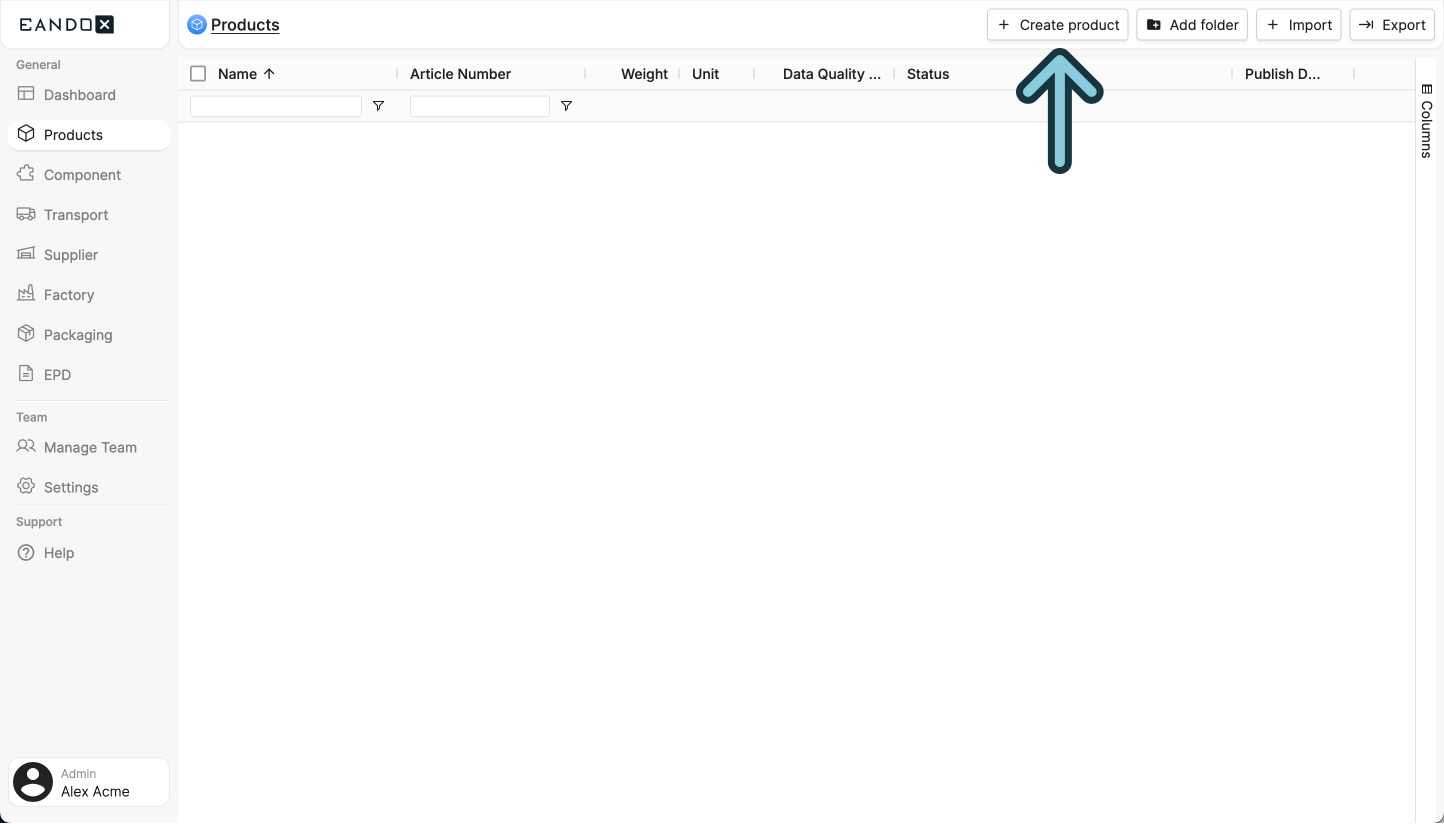
This will open a sidepanel where you can fill out the necessary information about your product. This information can be changed later on, but it is recommended to fill it out correctly the first time.
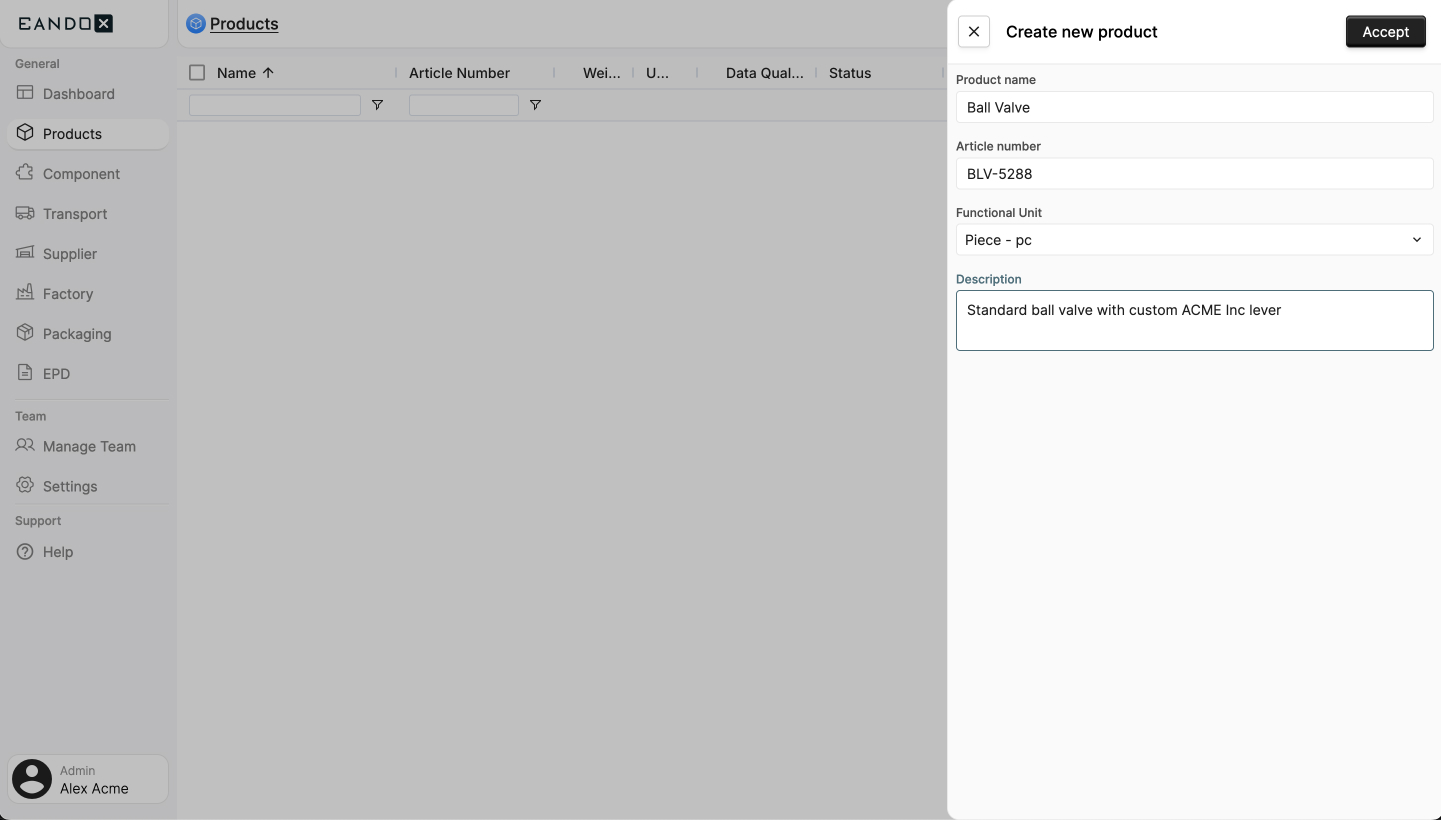
Make sure to pick the right functional unit
The functional unit is the unit in which the product is sold. For our Ball Valve this would be Piece - pc, since the product will be sold as a single unit.
If the product would instead be something like a Zipper or Wood Pellets, a unit of Meter - m or Kilogram - kg would be more appropriate.
Click the Accept button to create the product. This will take you to a product page where you can see and edit the details of your product, and start attaching other entities to it.
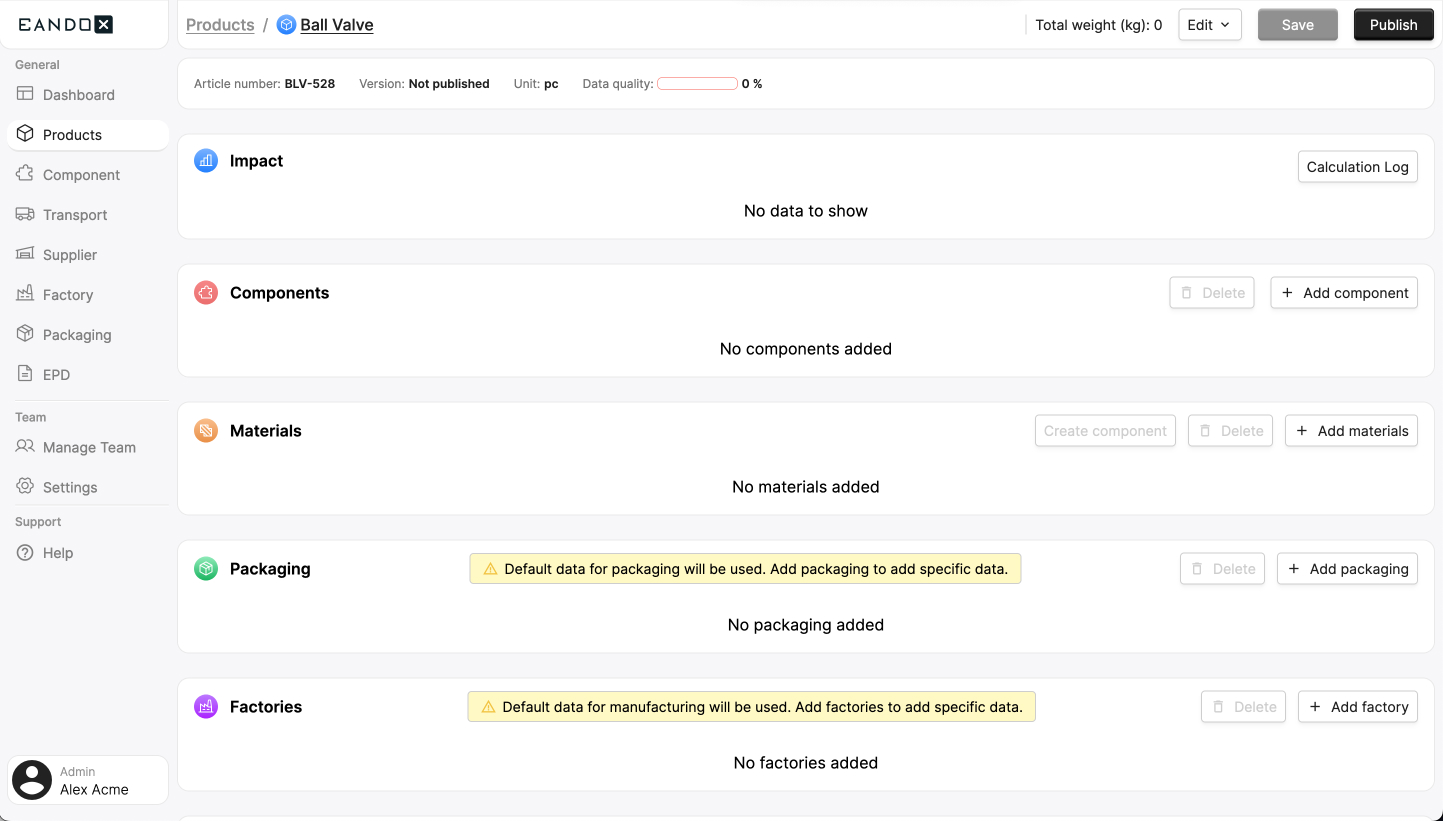
Entities
Entities are referring to the different data types that you can create or manage in EandoX. The entities are Product, Component, Material, Packaging, Factory, Transport and Supplier.
To get an overview of all the entities and how they relate to each other, you can read the Workflow overview.
Adding supplier components
Now that the product is created, we can start adding the supplier components to it.
Find the Components section, and click the Add component button.

This will open a sidepanel where you can search for all components and products that are available in your catalog and library, sorted by supplier.
Library vs catalog
The term Catalog is used when speaking about the collection of products, components, packaging, and factories created by your company.
The Library contains products created by external suppliers.
Find the components you want to add, select them, and click the Add component button in the top right corner.
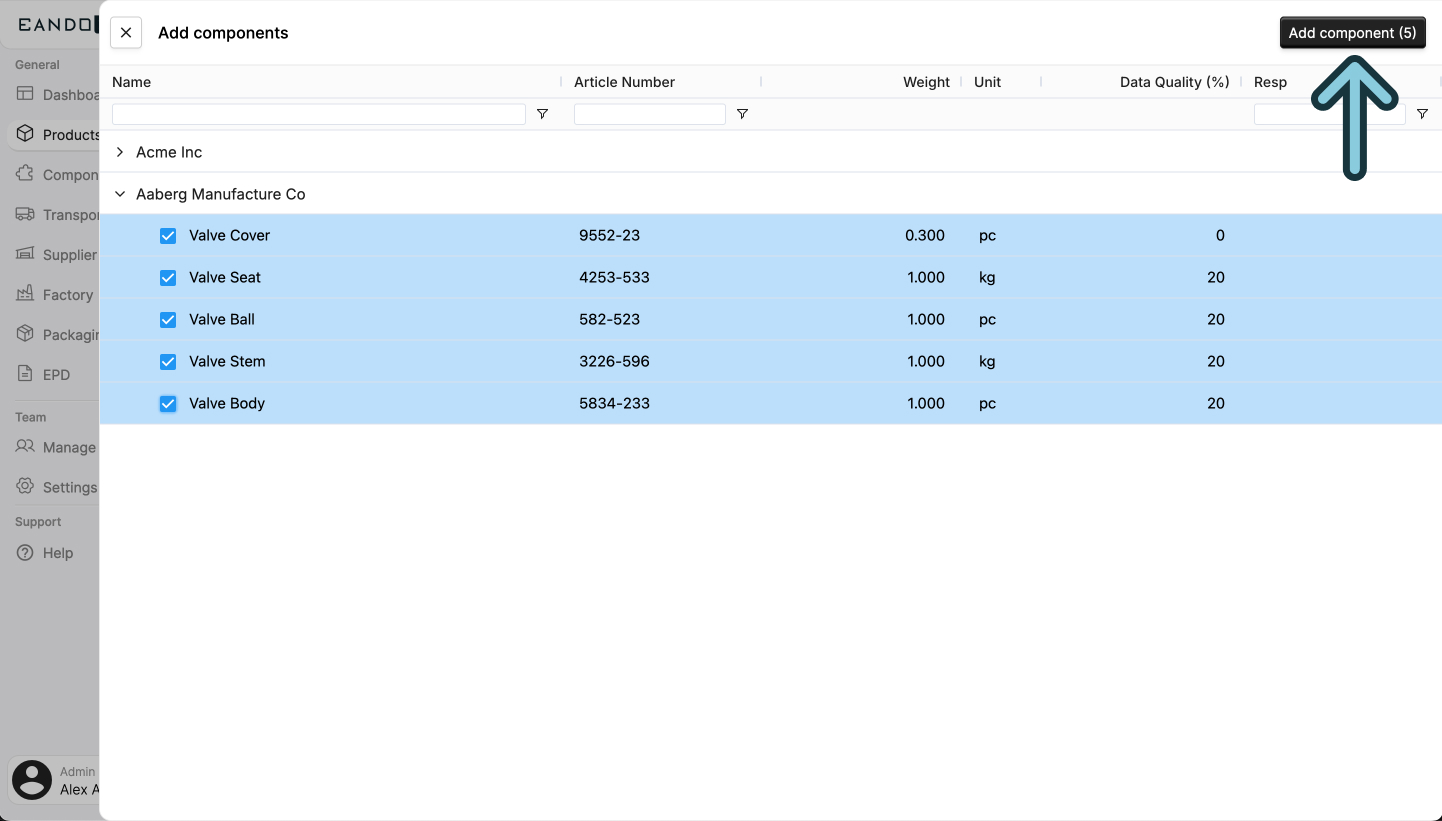
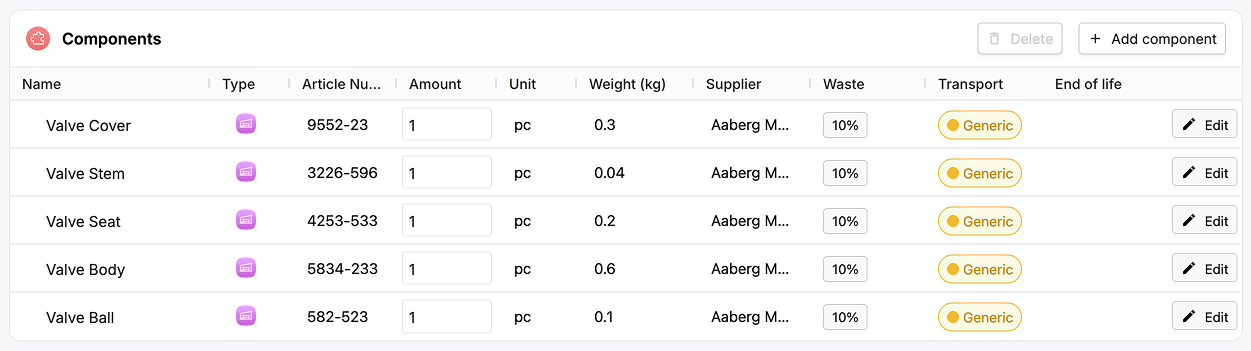
You will now see that the components have been added to the list of components in your product.
Further reading
Read more about components here.
Adding materials for the in-house manufactured part
Now that we have added all the supplier components, we need to add data for the lever that is manufactured by your own company. We do this by adding the materials it consists of in the Materials section.
Find the Materials section, and click the Add materials button.

This will open a sidepanel where you can search for all materials available in EandoX.
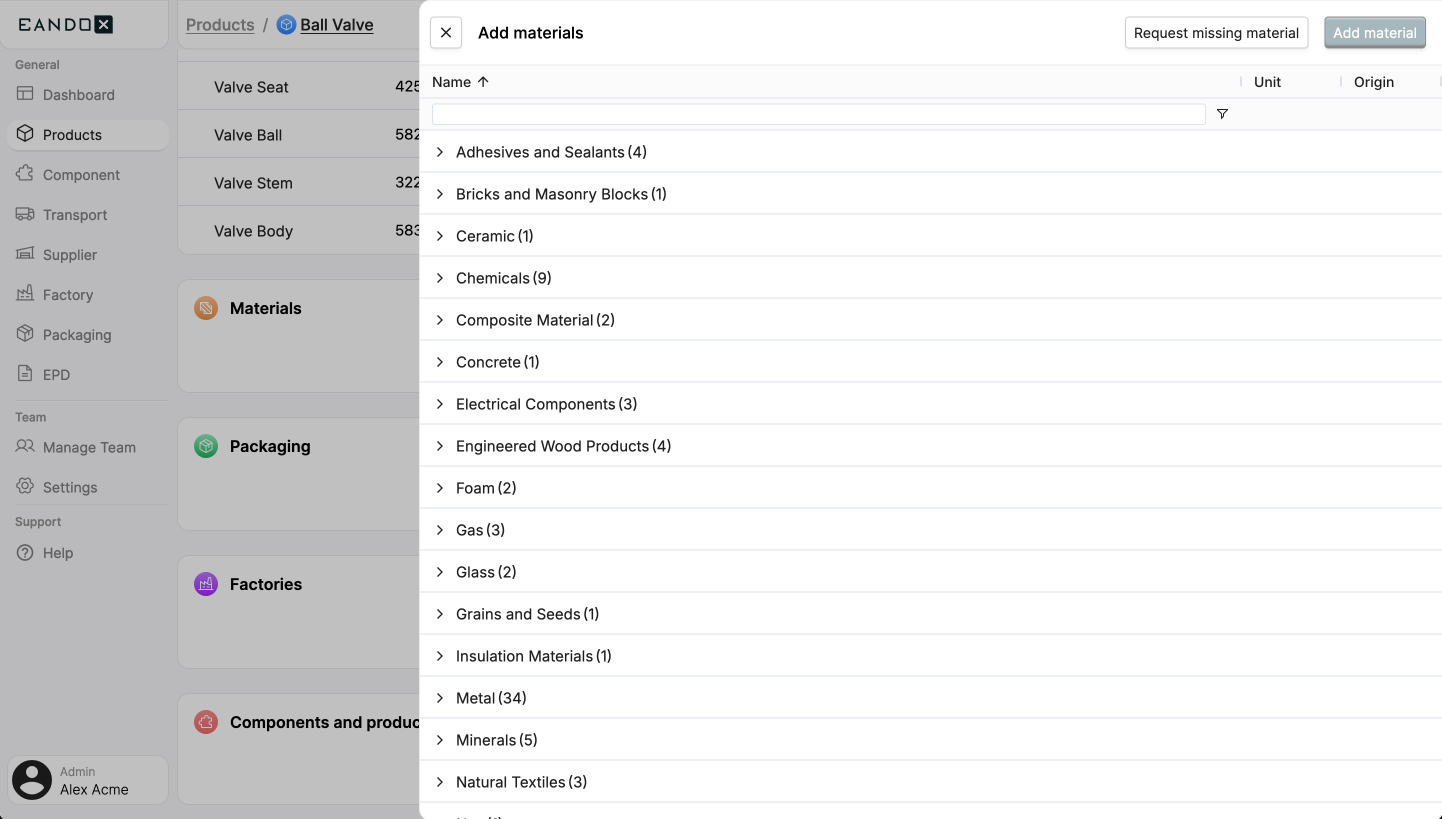
Missing a material?
If you can't find the material you need, you can click the Request missing material button in the top right corner of the sidepanel. This will allow you to send us a request so that we can add it to the platform.
Select the materials you want to add. Then click the Add material button in the top right corner of the sidepanel.
You will now see that the materials have been added to the list of materials in your product.

Now you need to fill out how much material is used in the product.
Click the Weight field for each material and fill out the value. The unit is defined in the Unit column.

More data = better results
You can add data on more properties than just the weight, such as information on material waste, product end-of-life and transportation.
To see those properties, click the Edit button at the end of the material row.
Generic data will be used for all unfilled fields. This is fine for a first iteration of a product. However, this will lower the products data quality, meaning that the final calculations will be less accurate. It might result in a poorer impact score as well.
It is recommended to come back to the product at a later point and add more data.
Read more about the material properties here.
All done!
Congratulations! With the components and materials added to the product, you now have the baseline of the data required by EandoX.
You can now start inspecting the impact graphs (at the top of the product page) and start generating EPDs.
The supplier components you added will make it easy to keep the data current, since your products will update automatically when the supplier updates their components.
Want to improve your product?
You might have noticed that we left the sections for packaging and factories blank. This works as a start (since EandoX will automatically add generic data to these fields), but it is recommended to fill it out at some point.
Read our guide on improving your first product to learn about adding packaging, factories, and creating reusable components.